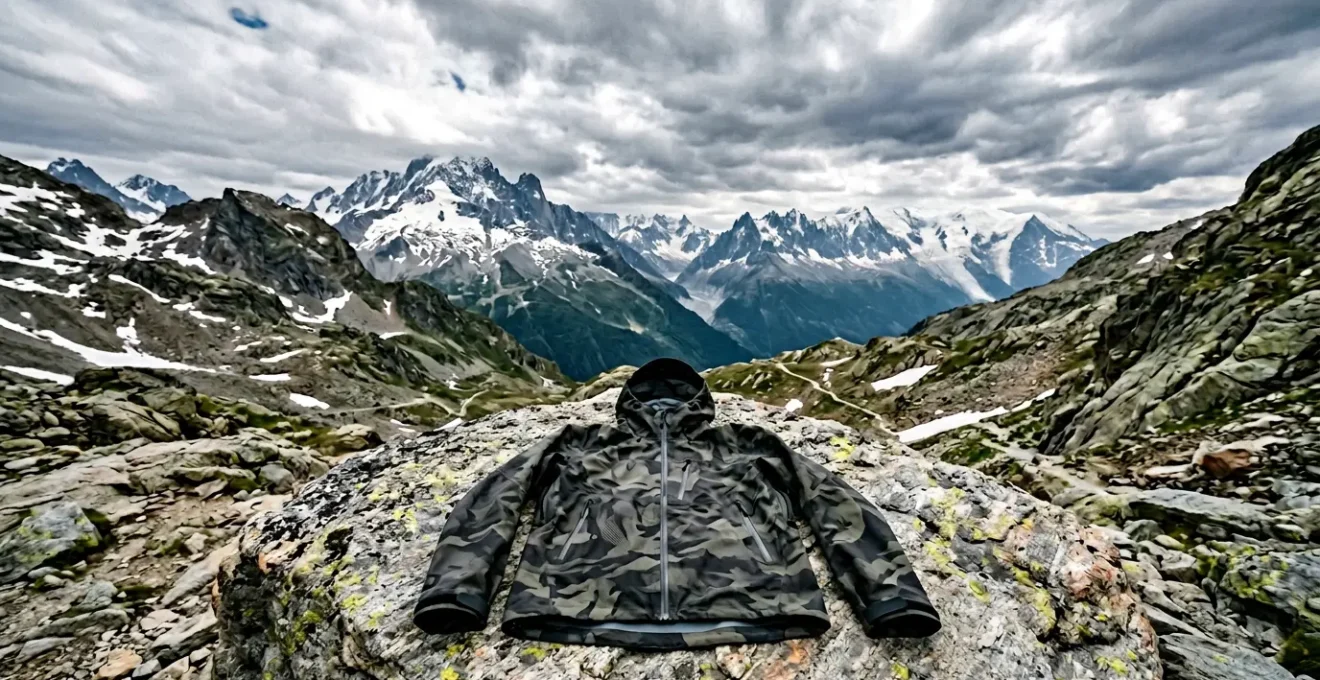
For the serious alpinist, a 3-layer hardshell is not a luxury, it’s a non-negotiable component of your safety system, prized for its superior failure tolerance under expedition stress.
- 2.5-layer jackets are lighter but their printed-on backing is a critical point of failure, prone to abrasion and delamination from sweat and pack straps over time.
- 3-layer jackets bond a protective inner fabric to the membrane, creating a robust system that withstands internal and external abrasion, ensuring the membrane’s integrity when you need it most.
Recommendation: Invest in a 3-layer hardshell. Its durability, repairability, and predictable performance in the worst conditions provide the field-tested confidence required for high-altitude and winter pursuits.
When you’re miles from the trailhead and the sky turns a menacing shade of grey, the trust you have in your gear is absolute. Your hardshell jacket, in that moment, isn’t just clothing; it’s your personal storm shelter, your barrier against hypothermia, your lifeline. The debate between 2.5-layer and 3-layer construction often gets simplified to a basic trade-off: weight versus durability. The common wisdom says a 2.5L is for a light emergency shell, while a 3L is the ‘serious’ option for mountaineers. While true on the surface, this advice misses the critical point for anyone venturing into unforgiving environments.
This isn’t a simple question of good versus better. It’s a question of failure tolerance. When you are pushing your limits, you must understand not just how your gear performs, but how it fails. A cheap rain poncho will keep you dry for a bit, but it will shred in high winds. The difference between a 2.5L and a 3L hardshell is more subtle, but just as critical. The real key to choosing the right jacket lies in understanding how the entire system—from the face fabric to the DWR coating to the membrane itself—maintains its integrity under the unique stresses of alpinism: heavy packs, abrasive ice, constant motion, and extreme temperature swings.
Instead of just comparing spec sheets, we’re going to dissect the real-world performance that defines an expedition-worthy hardshell. We will explore how to maintain its first line of defense, decipher what breathability ratings actually mean in the field, and understand why a noisy, stiff jacket can be an alpinist’s best friend. This is a field-tested perspective on choosing a piece of equipment that you can stake your life on.
This guide breaks down the essential technical aspects and field-tested knowledge you need to make an informed decision. The following sections will equip you with a deeper understanding of your most critical piece of outerwear.
Summary: The Field Guide to 2.5L and 3L Hardshell Fabrics
- DWR Wash-In vs Spray-On: Which Revives Beading Best?
- RET and MVTR: What Do These Breathability Numbers Actually Mean?
- Tenacious Tape: How to Patch a Gore-Tex Jacket in the Rain?
- The Crinkle Factor: Why Stiff Jackets are Louder but More Durable?
- Pit Zips: Are They Mandatory if the Membrane is “Breathable”?
- Denier vs Weave: Why Higher Denier Doesn’t Always Mean Stronger?
- Water Repellency: Why Sweat Moves Away from Skin?
- Sustainable Yurt Rentals in Winter: How to Stay Warm at -20°C Without High Costs?
DWR Wash-In vs Spray-On: Which Revives Beading Best?
The first line of defense for any hardshell is not the waterproof membrane itself, but the Durable Water Repellent (DWR) finish on the face fabric. This is what causes water to bead up and roll off. When it fails, the outer fabric “wets out,” becoming saturated. The jacket remains waterproof, but its breathability plummets, and you feel cold and clammy. Reviving DWR is therefore the most crucial piece of maintenance you can perform. The two primary methods are wash-in and spray-on treatments, and for a high-performance jacket, the choice is critical.
Wash-in products offer convenience and are often touted for their longevity. However, they coat the entire garment, inside and out. For a 3-layer jacket, this is a problem. You are applying a water-repellent coating to the inner liner, which is designed to wick moisture *away* from your body and toward the membrane. As Gore-Tex’s own technical documentation warns, wash-in treatments can hinder a garment’s breathability by impeding this wicking process.
A spray-on DWR treatment is the professional choice for any multi-layer system. It allows you to apply the treatment precisely where it’s needed: on the exterior face fabric. You can concentrate on high-wear areas like the shoulders and cuffs without compromising the internal moisture management system. For an expensive piece of gear where breathability is a key performance metric you paid for, you must protect that function. Sacrificing breathability for the minor convenience of a wash-in is a poor trade-off in the mountains.
RET and MVTR: What Do These Breathability Numbers Actually Mean?
When you read a jacket’s technical specifications, you’re bombarded with acronyms like RET and MVTR. These are lab-measured metrics for breathability, but their real-world meaning is often lost in translation. Understanding them helps you cut through the marketing and identify truly high-performance materials. Think of them as two sides of the same coin: one measures resistance, the other measures flow.
RET (Resistance to Evaporative Heat Transfer) measures how much the fabric resists the passage of water vapor. Therefore, a lower RET value is better. An RET rating of 0-6 is considered excellent, suitable for high-output activities like ski mountaineering. A rating of 7-13 is good for general hiking, while anything over 20 is essentially a plastic bag. For an alpinist, targeting a jacket with an RET below 6 is a priority.
MVTR (Moisture Vapor Transmission Rate) measures the volume of water vapor that can pass through a square meter of fabric over 24 hours. Here, a higher MVTR value is better. A rating of 20,000g/m²/day or more is expedition-grade. It signifies that the membrane can actively move a large volume of sweat, keeping you drier during strenuous climbs.
This visualization shows the principle at work: moisture vapor moves from the high-pressure, warm environment inside your jacket to the low-pressure, cold environment outside. However, these lab numbers represent ideal conditions. The real performance depends on the temperature and humidity gradient, as this comparative guide from inov-8 illustrates in detail.
| Rating Type | Performance Level | Value Range | Suitable Activity |
|---|---|---|---|
| RET | Excellent | 0-6 | High-output activities, trail running, ski mountaineering |
| RET | Good | 7-13 | Moderate efforts, hiking, ski touring |
| RET | OK | 14-20 | Low-output activities |
| RET | Poor | 20+ | Not suitable for physical exercise |
| MVTR | Low | 5,000-10,000 g/m²/day | General outdoor use, low-output activities |
| MVTR | Good | 10,000-15,000 g/m²/day | Active use: hiking, mountaineering |
| MVTR | Excellent | 20,000+ g/m²/day | Intense aerobic activities, warm climates |
Tenacious Tape: How to Patch a Gore-Tex Jacket in the Rain?
A long expedition is a war of attrition on your gear. A misplaced ice axe, a snag on a sharp rock, or even a stray crampon point can instantly compromise your expensive hardshell. A 2.5-layer jacket with a torn membrane is often a write-off. A 3-layer jacket, however, is an investment built to be repaired. Knowing how to perform an effective field repair is not just a useful skill; it’s a critical safety procedure. A small, unpatched hole can let in enough moisture to chill your core and turn a manageable situation into a dangerous one.
Tenacious Tape is the gold standard for field repairs on technical fabrics. It’s a high-strength, waterproof adhesive tape that can create a durable, flexible, and airtight seal, even in suboptimal conditions. Carrying a small roll in your first-aid kit is non-negotiable. The key to a successful patch, especially in wet and cold weather, is proper preparation and application. Simply slapping a piece of tape over a tear won’t work; you need to follow a protocol to ensure a lasting bond that will get you back to the trailhead safely.
The following checklist, based on Gore-Tex’s own repair recommendations, outlines the professional protocol for a field repair. Mastering this can save your jacket and, more importantly, keep you safe when you’re exposed to the elements.
Field Repair Protocol: Patching Your Hardshell Jacket
- Clean and Prep: Clean the damaged area as thoroughly as possible. Use an alcohol wipe from your first-aid kit to remove dirt and body oils that prevent adhesion. Trim any loose threads around the tear.
- Warm the Patch: In cold conditions, the adhesive will be stiff. Warm the tape patch against your skin or in a pocket for a minute to improve its initial tackiness.
- Size and Center: Cut the patch with rounded corners to prevent peeling. Ensure the patch overlaps the tear by at least 0.5 inches (12mm) in all directions.
- Apply Firm Pressure: Apply the patch and use firm, steady pressure with your thumb or a smooth object. Work from the center outward, smoothing out all air bubbles and ensuring the edges are completely flat.
- Activate the Adhesive: If possible, apply gentle, persistent heat. Huddle over the patch to use your body heat or place the repaired area inside your jacket against your torso for 15-20 minutes to help the adhesive cure and form a stronger bond.
The Crinkle Factor: Why Stiff Jackets are Louder but More Durable?
One of the first things people notice about a high-end 3-layer expedition shell is the noise. It crinkles. It’s stiff. Compared to a soft, pliable 2.5-layer jacket, it can feel almost armor-like. This “crinkle factor” is often seen as a downside, but for an alpinist, that sound is the reassuring noise of absolute reliability. The stiffness and the noise are direct byproducts of the jacket’s superior construction and a key indicator of its failure tolerance.
This robustness starts with the face fabric. As testing from leading outdoor gear laboratories confirms that top-tier 3-layer hardshells often use bombproof, high-denier face fabrics like 70D or even 100D nylon. These thick yarns create a formidable barrier against abrasion. In contrast, 2.5-layer jackets prioritize packability and use much lighter fabrics (30D or 40D) that are simply not designed to withstand the sustained abuse of a heavy pack or contact with rock and ice.
But the primary source of stiffness is the 3-layer lamination process itself. To create a 3L system, the waterproof membrane is sandwiched and bonded between the outer face fabric and an inner backer fabric. As experts in technical garment construction explain, this process is key to a jacket’s structural integrity.
The lamination adhesives used to bond the 3 layers together add to the overall stiffness. A more robust lamination prevents delamination and enhances structural integrity.
– Outdoor Research Technical Documentation, Comparing 2L and 3L Jacket Construction
This bonded inner fabric is the critical advantage of a 3L system. It protects the delicate membrane from the inside—from your own sweat, oils, and the abrasion of your mid-layers. In a 2.5L jacket, a thin, painted-on layer provides this protection, and it is a notorious point of failure. Over time, it can wear away, exposing the membrane to contamination and delamination. The crinkle of a 3L jacket is the sound of a system that won’t fail from the inside out.
Pit Zips: Are They Mandatory if the Membrane is “Breathable”?
Modern waterproof-breathable membranes are technological marvels. Brands market them with claims of unparalleled breathability, leading some to believe that features like pit zips (underarm zippers) are obsolete. This is a dangerous misconception for anyone engaged in high-output mountain sports. No matter how “breathable” the fabric is, it has physical limits. When you are working hard, you generate far more heat and moisture than any membrane can transport on its own.
This is where mechanical venting becomes a critical part of your moisture management system. Pit zips are not a bonus feature; they are an emergency heat dump. Opening them allows you to rapidly flush out a massive volume of warm, moist air, preventing the buildup of condensation inside your jacket. Relying solely on membrane breathability during a strenuous ascent is a recipe for getting soaked from the inside out. Performance testing consistently shows that underarm vents and pit zips are essential for keeping air circulating during high-output activities, providing a level of ventilation that breathable membranes alone simply cannot achieve.
Think of your jacket as a house. The breathable membrane is like having a few windows slightly open—good for background ventilation. The pit zips are like throwing open the front and back doors to create a cross-breeze. When you’re overheating on a steep snow slope, you need that immediate, massive airflow. For an alpinist, a hardshell without pit zips is a design flaw. It prioritizes minimalist aesthetics over fundamental thermal regulation and safety.
Denier vs Weave: Why Higher Denier Doesn’t Always Mean Stronger?
When assessing a hardshell’s durability, “denier” is the number everyone looks for. Denier (D) is a unit of measurement for the thickness or weight of a fiber; a higher number, like 70D, means a thicker, heavier yarn than a lower number, like 30D. It’s an easy metric to compare, leading to the common assumption that higher denier automatically equals a stronger, more durable fabric. While there is a correlation, the reality is far more nuanced. The weave of the fabric can be just as important, if not more so, in determining its real-world tear strength and abrasion resistance.
The most significant example of this is the ripstop weave. You can often see it as a tiny grid pattern in the fabric. Ripstop integrates a thicker, stronger reinforcement yarn at regular intervals in the weave. This reinforcement acts as a tear-stopper. If a puncture does occur, the rip is contained within one of the small squares, preventing a catastrophic failure. A plain weave fabric, even at the same denier, lacks this structure and will tear much more easily.
The difference in performance is not subtle. According to standard textile testing, a 70D Nylon Ripstop exhibits tear strength of around 15-20 lbs/inch, whereas a standard 70D Nylon Plain Weave might only test at 5-8 lbs/inch. This demonstrates that a well-constructed 40D ripstop can be more resilient in the field than a poorly woven 70D fabric. When choosing an expedition shell, look beyond just the denier number and inspect the fabric for a ripstop pattern. It’s a clear sign that the jacket was designed with failure tolerance in mind.
Water Repellency: Why Sweat Moves Away from Skin?
The process of “breathing” in a waterproof jacket is a fascinating bit of physics driven by a simple principle: moisture moves from areas of high concentration and temperature to areas of low concentration and temperature. When you are working hard, the microclimate inside your jacket is warm and humid. The air outside is (usually) colder and drier. This pressure differential is what forces water vapor molecules from your sweat to pass through the microscopic pores of the membrane to the outside.
This elegant system has a critical vulnerability: “wetting out.” As we discussed, if the DWR finish fails, the outer face fabric becomes saturated with rain. This layer of water does two disastrous things. First, it clogs the pores of the membrane from the outside, effectively stopping the breathing process. Sweat vapor is now trapped inside. Second, and more dangerously, that trapped moisture acts as a potent thermal conductor. Research from equipment specialists demonstrates that this is a major safety concern, as wet layers can transfer body heat nearly 25 times faster than dry ones. This is how hypothermia can set in, even when you’re wearing a “waterproof” jacket.
This is why water repellency is paramount. The DWR’s job is not to make the jacket waterproof—that’s the membrane’s role. Its job is to keep the face fabric dry so that the pressure differential remains in effect and the membrane can continue to do its job. A beading outer surface is a sign of a functioning system. When the beading stops, your jacket’s performance is severely compromised, and your safety margin shrinks. Maintaining your DWR is maintaining your jacket’s ability to manage moisture and, by extension, your body temperature.
Key Takeaways
- Prioritize Failure Tolerance: A 3-layer jacket is superior not just for durability, but because its bonded construction is far more resistant to delamination and internal abrasion, a common failure point in 2.5L shells.
- Breathability is a System: True moisture management relies on a high-performance membrane (low RET, high MVTR), a functional DWR coating to prevent “wet out,” and mandatory mechanical venting (pit zips) to dump heat during high exertion.
- Durability is in the Details: Look beyond just the denier number. A ripstop weave provides significantly more tear strength, and a stiff, “crinkly” fabric is often a sign of the robust lamination needed for expedition use.
Sustainable Yurt Rentals in Winter: How to Stay Warm at -20°C Without High Costs?
The title of this section may seem out of place, but the core principle—how to achieve long-term performance and security without recurring high costs—applies perfectly to your most critical gear. In the context of an expedition hardshell, “sustainability” is not about recycled materials alone; it’s about longevity, repairability, and reducing the need for replacement. The most sustainable jacket is the one you buy once and maintain for a decade, not the one you replace every three seasons.
This is the fundamental argument for investing in a 3-layer system. The initial “cost” is high, but the cost of replacing a delaminated, non-repairable 2.5-layer jacket every few years is ultimately higher, both for your wallet and for the environment. The outdoor industry itself is voting with its product lines. Analysis shows major brands have been systematically discontinuing their 2.5-layer shells in favor of more durable 3-layer constructions, acknowledging that for serious users, longevity is the primary concern.
Achieving this longevity requires a partnership with your gear. As environmental regulations have led to the phasing out of older, more persistent DWR chemistries, modern treatments are less durable and require more frequent reapplication. This isn’t a flaw; it’s the new reality of responsible gear ownership. Staying “warm” and “dry” in the long run means committing to a maintenance schedule. A 3-layer jacket is an investment worthy of that commitment. Its robust construction can withstand dozens of wash and re-proofing cycles, whereas a lighter 2.5L shell may not survive such a rigorous maintenance regimen.
Ultimately, choosing an expedition hardshell is an investment in your own safety and confidence. By understanding the principles of failure tolerance, moisture management, and robust construction, you can select a piece of equipment that will serve as a trusted partner in the mountains for years to come.