Mastering polished limestone isn’t about brute strength or more chalk; it’s about adopting a smarter, tactical approach to climbing.
- Effective technique, body positioning, and precise footwork are more crucial for grip on slick rock than sheer finger power.
- A comprehensive safety strategy involves understanding your gear, reading the rock’s condition, and adapting habits learned in the gym to the unpredictable outdoor environment.
Recommendation: Shift your mindset from ‘pulling harder’ to one of ‘low-impact climbing,’ focusing on finesse, rock intelligence, and a systemic approach to safety to climb confidently on any texture.
There’s a moment every sport climber knows well: the sudden, sickening skitter of a foot or hand on a hold that felt solid a second ago. On popular limestone crags, this experience is all too common, where thousands of passages have polished the rock to a glassy, frustrating sheen. The common advice—brush the holds, chalk up more, or simply “get stronger”—often feels inadequate. This frustration with polished holds is understandable, but it often masks a wider set of challenges unique to limestone: razor-sharp pockets that shred skin, questionable-sounding holds, and complex rope management issues that simply don’t exist in a climbing gym.
But what if the key to conquering polished rock isn’t about overpowering it, but outsmarting it? The real solution lies in a tactical shift. This guide reframes the problem away from a simple lack of grip strength and towards a more holistic, intelligent strategy. We will explore a ‘low-impact’ climbing style that prioritizes meticulous technique, gear intelligence, and proactive risk assessment over brute force. This approach not only solves the issue of slipping on polished holds but also addresses the broader safety concerns inherent to climbing on varied and sometimes friable rock.
To build this comprehensive skill set, we will deconstruct the essential tactics every climber needs. This article breaks down everything from advanced finger protection and methods for testing suspicious holds to the critical differences in belaying and anchor cleaning that separate safe outdoor practice from risky gym habits. Get ready to transform your approach and climb with renewed confidence.
Summary: A Tactical Guide to Climbing on Polished and Sharp Rock
- Tape or Glue: How to Protect Fingers from Sharp Limestone Pockets?
- The Hollow Sound: How to Test a Hold Before Committing Your Weight?
- Chalk Deception: Why Following Tick Marks Can Lead You Off-Route?
- Sharp Edges: How to Position Quickdraws to Save Your Rope from Cuts?
- Thread or Lower: Which Cleaning Method is Safer on Overhanging Limestone?
- Dynamic vs Static Belay: Why Gym Habits Can Be Dangerous on Real Rock?
- Why You Should Never Stand on the Edge of a Sedimentary Cliff?
- Technical Alpine Climbing: How to Self-Arrest on Icy Slopes Without Injury?
Tape or Glue: How to Protect Fingers from Sharp Limestone Pockets?
Limestone is notorious not just for its slippery surfaces but for its sharp, aggressive pockets that can feel like gripping broken glass. Moving from molded plastic holds in a gym to this sharp reality can be a shock to the system—and to your skin. Protecting your fingers is not just about comfort; it’s a crucial part of performance and injury prevention. With finger issues making up a significant portion of climbing injuries, a proactive approach is non-negotiable. A 2017 study highlighted that 41% of all climbing upper extremity injuries involve the fingers, underscoring the need for diligent care.
For sharp pockets, two primary tools come into play: climbing tape and liquid skin glue or salve. Prophylactic taping—applying tape before your skin is damaged—can provide a durable, protective layer. When taping for a specific sharp hold or mono-pocket, create a thin, snug ring of tape around the joint. Avoid making it too thick, as this can reduce sensitivity and make it harder to feel the hold’s nuances. The goal is protection, not a clumsy gauntlet.
For smaller cuts or areas where tape feels too bulky, climbing-specific skin glue or a solid salve can be a game-changer. These products create a tough, artificial callus over a wound or thin skin, allowing you to continue climbing with less pain and preventing further damage. This is a tactical decision: applying it mid-route or between attempts can be the difference between sending and bailing due to skin issues. Ignoring finger health can lead to pulley injuries, which require weeks of rest and a careful return to climbing, making preventative care an essential part of your climbing strategy.
The Hollow Sound: How to Test a Hold Before Committing Your Weight?
On a high-traffic sport route, it’s easy to assume every hold is bombproof. This is a dangerous assumption. Limestone, being a sedimentary rock, is prone to weathering and fracturing. A hold that has been used by hundreds of climbers could be the next one to break. Developing “rock intelligence”—the ability to assess the stability of the rock you’re about to trust with your life—is a fundamental outdoor skill. It begins with your senses, primarily sound and sight, long before you commit your full body weight.
A hollow, drum-like sound when you tap a hold is a universal red flag indicating a detached or partially detached block. Don’t rely on a single tap. Use your knuckle or a nut tool to tap in several spots around the hold’s perimeter. Supplement this auditory test with a thorough visual inspection. Look for hairline fractures around the hold, especially if they connect to other features. Fresh rock scars below or signs of water seepage are also clear warnings that the rock’s internal structure may be compromised. Remember that your force on a hold is directional, so your test should be too. Pull gently in the direction you plan to use it, feeling for any shifting or vibration.
Your Action Plan: Progressive Loading Protocol for Suspect Holds
- Scan the Area: Before climbing, scan the route and the area above the anchor for loose blocks, crumbling rock (choss), and fresh rockfall scars.
- Acoustic Feedback: Tap the suspect hold with a knuckle or nut tool. Listen for a hollow or drum-like sound, which signals a potentially large, detached block.
- Visual Triage: Look for hairline fracture lines, “zipper” features along calcite veins, and water-seepage stains that indicate internal weakness.
- Directional Pull: While maintaining solid handholds on known stable features, apply a gentle, directional pull with your fingers on the suspect hold.
- Partial Weighting: Cautiously weight the hold with one foot while keeping your full body weight on secure handholds to assess its stability in the actual direction of force.
This systematic approach moves from low-risk observation to a final, controlled test. It turns a blind guess into an informed decision, a core tenet of safe climbing on natural rock.
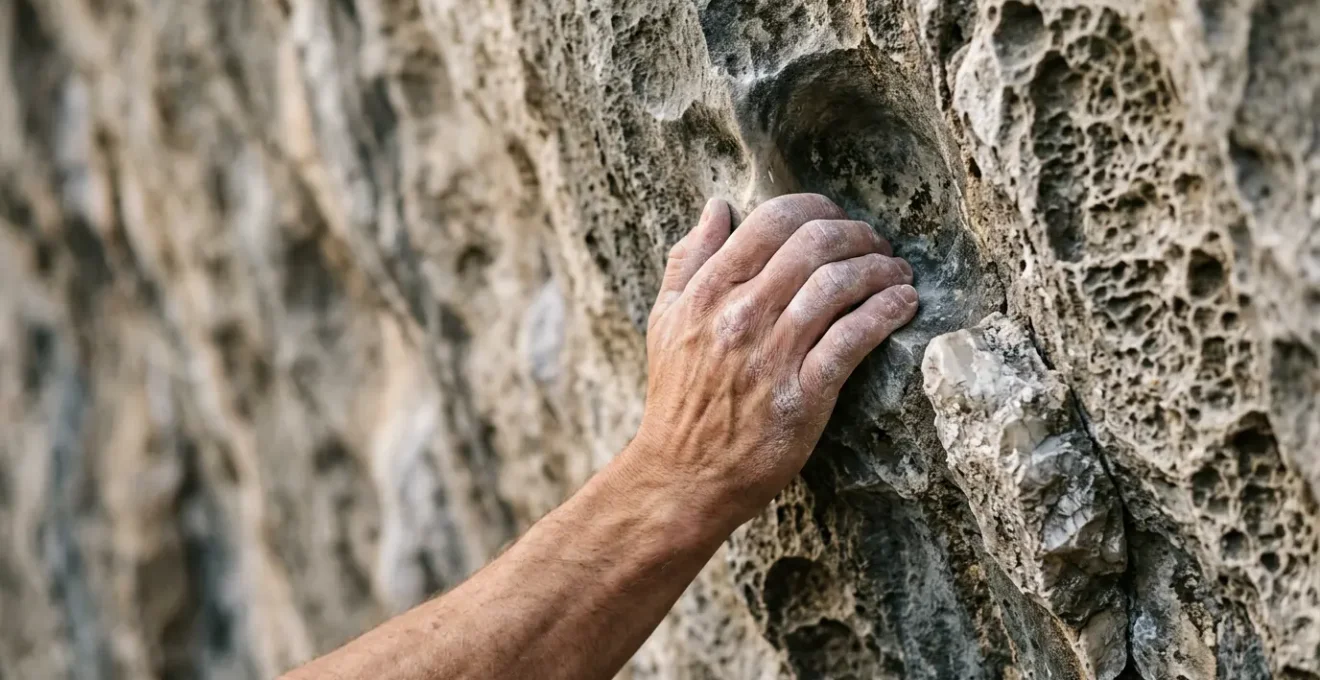
Chalk Deception: Why Following Tick Marks Can Lead You Off-Route?
At any popular crag, the route is often illuminated by a constellation of white chalk marks. For a climber unfamiliar with the route, these “tick marks” can seem like a helpful roadmap left by those who came before. However, blindly following this chalky breadcrumb trail is a tactical error. Chalk shows you where other people have gone, but it doesn’t show you the optimal sequence for your body, your height, or your climbing style. What works as a high-step for a tall climber might be an impossible move for someone shorter, who might be better served by a less-obvious intermediate hold that remains unmarked.
Relying on tick marks trains you to look for chalk, not for holds. It shuts down your own route-finding ability and prevents you from developing the crucial skill of reading the rock. A faint, chalk-dusted crimp might be the key to unlocking a sequence, but your eyes, conditioned to search for bright white patches, may slide right past it. This is the chalk deception: it promises an easy path but often conceals a better, more efficient, or safer one. True mastery comes from seeing the wall as a blank canvas of possibilities.
As the image above illustrates, a heavily chalked wall presents a maze of options. The brightest marks indicate the most popular holds, but the faded traces and clean rock in between hold the secrets to a personalized ascent. The next time you’re on a route, try to ignore the chalk at first. Use your own judgment to find holds that suit your reach and strengths. You might discover a sequence that feels far more natural and efficient, turning a frustrating struggle into a fluid dance. This is the essence of climbing with your own intelligence, not someone else’s.
Sharp Edges: How to Position Quickdraws to Save Your Rope from Cuts?
While a fall onto a polished slab is a concern, a far greater danger on sharp limestone is the risk of cutting your rope. A rope is incredibly strong when loaded vertically, but its integrity is dramatically compromised when it is dragged under tension across a sharp edge. Many limestone crags feature sharp arêtes, flakes, and “razor-like” tufas that can pose a significant threat. Protecting your rope is not an optional extra; it is a critical safety function of proper quickdraw placement and extension.
The key principle is to ensure the rope runs freely without grinding against any rock edges. If a route wanders or traverses across a sharp feature, clipping a standard quickdraw can create a dangerous pivot point. In a fall, the rope will grate against this edge with immense force. As Climbing Magazine’s analysis on the topic makes clear, the risk is severe:
A rope that grates laterally across an edge will cut at much lower forces than if that rope was secured in place with clipped protection on either side of the arête.
– Climbing Magazine Analysis, A Cut Rope Can be Deadly – Sharp Edge Safety Report
To mitigate this, climbers must use extendable “alpine” draws. An alpine draw, made from a 60cm sling, allows you to lengthen the connection between the bolt and the rope, letting the rope hang clear of the sharp edge. A landmark UIAA safety report on sharp edges documented multiple incidents where ropes failed, recommending the use of extended draws and placing “directional” protection to prevent lateral rope movement. Before you climb, analyze the route’s path. Identify any sharp arêtes or flakes the rope will cross. Plan to use an extended alpine draw on the bolt just before that feature to ensure a clean, safe rope line.
Thread or Lower: Which Cleaning Method is Safer on Overhanging Limestone?
Reaching the anchors marks the end of the climb, but not the end of the risk. How you get back down is a critical decision, especially on the steep, overhanging routes common in limestone sport climbing. The two primary methods for cleaning an anchor (removing your gear) are lowering and threading-and-rappelling. While both are valid techniques, one is often significantly safer in an overhanging context: lowering.
Threading the anchor involves untying from your rope, passing it through the anchor’s fixed hardware (like chains or rings), and then rappelling. This method has the advantage of reducing wear on the crag’s fixed gear, as the rope is only pulled through once. However, it requires the climber to go “off belay” while tethered to the anchor, introducing a moment of significant personal risk. On an overhanging wall, any mistake during this process can result in an uncontrolled pendulum swing or a fall if the tether is not set up correctly.
For this reason, on most well-equipped sport routes, the preferred and safer method is to be lowered by your belayer. After clipping into the anchor with two quickdraws or a personal anchor system (PAS), you pull up a bight of rope, thread it through the lowest point of the fixed anchor hardware, and tie it back to your belay loop with a secure, backed-up figure-eight knot. Only after this new system is complete and double-checked do you remove your personal tethers and quickdraws and ask your belayer to lower you. This method ensures you are always connected to the primary belay system, dramatically reducing the potential for catastrophic error, especially when you’re tired at the end of a hard climb.
Dynamic vs Static Belay: Why Gym Habits Can Be Dangerous on Real Rock?
Belaying in a gym is a relatively controlled affair. The floors are flat and padded, the routes are straight, and the environment is predictable. This often fosters a “static” belay style, where the belayer stands in one spot, focused solely on feeding rope. Transferring this habit outdoors can be dangerous for both the climber and the belayer. Real rock is an unpredictable three-dimensional environment with uneven ground, potential rockfall, and wandering routes that create rope drag.
The primary difference is the need for a dynamic and active belay stance. A proper outdoor belayer is never passive. They are braced, often with one foot forward on the rock face itself, ready to absorb the force of a fall without being pulled off their feet and into the wall. This braced stance is critical, especially when there is a significant weight difference between the climber and belayer. Furthermore, an active belayer moves with the climber, stepping forward to give slack for a clip and stepping back to take in rope, actively managing friction on wandering routes.
Unlike the ideal conditions in a gym, the base of a crag can be a hazardous zone. The belayer must be positioned to avoid being hit by a falling leader, especially before the first bolt is clipped. A key outdoor technique is for the leader to place protection early and often. This not only protects the leader from a dangerous ground-fall but also protects the belayer from the climber falling directly onto them. Belaying outdoors is a tactical partnership that requires constant communication, situational awareness, and a dynamic approach that gym climbing rarely demands.
Why You Should Never Stand on the Edge of a Sedimentary Cliff?
Limestone, the stage for so many classic sport climbs, is a sedimentary rock. It was formed over millennia from the accumulation of shell, coral, and skeletal fragments, compressed into layers. While this process creates fantastic climbing features, it also means the rock’s structure can have inherent weaknesses, especially at the very edge of a cliff. Standing on the lip of a limestone or any sedimentary cliff is an unnecessary risk that many climbers take without understanding the geology beneath their feet.
The cliff edge is the point most exposed to weathering. Water, ice, and plant roots work their way into the rock’s horizontal layers (bedding planes) and vertical cracks, slowly but surely prying it apart. The section of rock at the very edge, known as a cornice, often lacks the support of the main rock mass below it. It can be a deceptively thin, cantilevered ledge just waiting to collapse under the weight of a person. There are countless documented incidents of hikers and climbers falling to their death when a cliff edge they were standing on simply gave way.
This is critically important when you top out on a route, are setting up a top-rope anchor, or are simply enjoying the view. Always stay several feet back from the edge. When building an anchor, extend it far back from the lip using static rope or long slings so that your master point is over solid ground. Treat every cliff edge with extreme suspicion. The solid-looking ground beneath your feet might be nothing more than a fragile crust with nothing but air beneath it. It is a simple rule that requires no special gear, only discipline and an understanding of the rock itself.
Key Takeaways
- Polished rock demands a tactical shift towards technique, body positioning, and precision over brute force and excessive chalk.
- A complete safety system extends beyond your knots; it includes intelligent gear placement, dynamic belaying, and the ability to assess rock quality.
- Adopt a ‘low-impact’ climbing mindset. Focus on climbing with awareness, finesse, and personal responsibility to navigate the outdoors safely.
Technical Alpine Climbing: How to Self-Arrest on Icy Slopes Without Injury?
At first glance, a discussion about self-arresting on an icy slope with an ice axe seems wildly out of place for a sport climber at a sunny limestone crag. You won’t be carrying an ice axe, and there is no snow. However, the core principle of the self-arrest holds a profound and universal lesson for every climber, regardless of their discipline. Self-arrest is the immediate, rehearsed, and violent action a mountaineer takes to stop a slide the instant it begins. It is their last line of defense when all other systems have failed.
While a sport climber’s safety system is built around ropes, harnesses, and belay devices, the self-arrest *mindset* is directly transferable. It is the philosophy of taking ultimate responsibility for your own safety and having a pre-rehearsed plan for when things go wrong. What is your “self-arrest” if your rope gets stuck when pulling it from an anchor? What is your immediate action plan if your belayer is incapacitated by rockfall? These are uncomfortable questions, but they represent the same proactive mindset.
This is the pinnacle of systemic safety: moving beyond simply trusting your gear and towards a state of constant preparedness. It means knowing how to escape the belay, ascend a rope, and perform basic partner rescue techniques. You may never need to slam the pick of an ice axe into a frozen slope, but you should absolutely cultivate the mentality that prepares you to act decisively in a worst-case scenario. This mindset, born in the high mountains, is what truly separates a competent climber from an expert one, ensuring you are an asset, not a liability, at the crag.
Start applying these tactical principles on your next trip to the crag. By doing so, you can transform your frustration with polished rock into a confident and intelligent climbing performance, secure in the knowledge that your skills go far beyond simply pulling on holds.