In summary:
- Effective foraging safety relies on a multi-layered system, not just memorizing edible plants.
- Mastering the identification of deadly mimics like Water Hemlock through multi-point checks is non-negotiable.
- Riparian zones pose unique microbial risks (like Giardia) that require specific decontamination protocols for all harvested greens.
- Sustainable harvesting follows concrete rules to prevent ecological damage, ensuring patch longevity for future foragers and wildlife.
- In survival scenarios, prioritizing plants by caloric density and understanding necessary processing techniques is more critical than simply finding something edible.
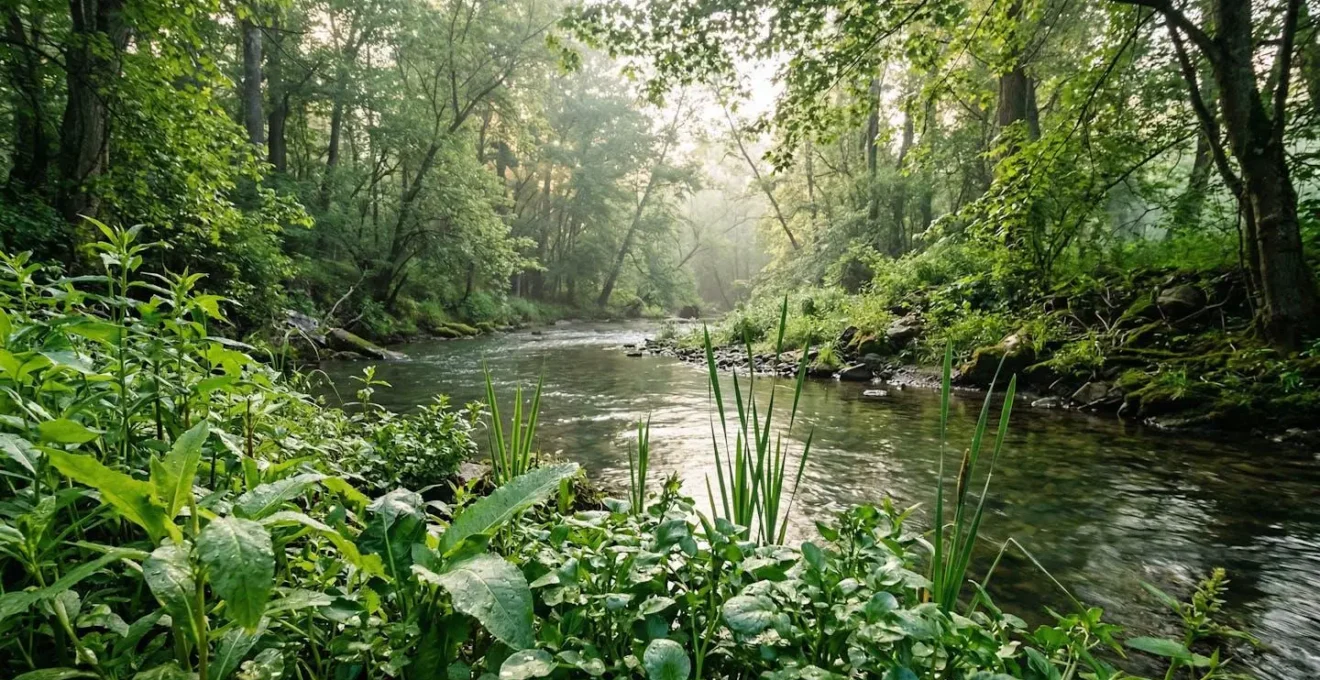
The allure of a riparian forest floor—the lush, vibrant zone alongside a river or stream—is powerful for any forager. Here, water abundance creates a treasure trove of tender shoots, succulent greens, and nourishing roots. For the survivalist or the foodie hiker, it represents a promise of sustenance and flavor. However, this abundance masks a critical danger that generic foraging advice often overlooks. The common refrain to “never eat anything you can’t identify” is a starting point, but it’s dangerously insufficient in this specific environment.
The very conditions that create this bounty also cultivate some of nature’s most lethal decoys. The risk is not just a stomach ache; it’s a matter of life and death, with plants like Water Hemlock mimicking edible relatives with frightening accuracy. Moreover, the water itself, while life-giving, can be a vector for unseen microbial threats like Giardia that contaminate otherwise safe-to-eat plants.
This guide rejects the simple “eat this, not that” approach. The key to unlocking the riparian pantry without paying the ultimate price is not a longer list of edible plants, but the mastery of a systematic, multi-layered risk assessment. It’s a botanist’s mindset of cautious verification that considers botanical mimics, microbial contamination, ecological impact, and pest-related dangers. We will delve into the precise, non-negotiable checks that separate a safe harvest from a fatal error.
This article provides a comprehensive framework for navigating the unique challenges of foraging near water. We will cover the critical identification differences between deadly toxins and their edible lookalikes, the necessary decontamination protocols for riparian harvests, the principles of sustainable foraging, and a strategic approach to finding food and water in a survival context.
Summary: A Systematic Guide to Safe Foraging in Riparian Environments
- Water Hemlock vs Wild Carrot: The Distinctions That Save Your Life
- Giardia on Greens: How to Wash Wild Harvests from Riparian Zones?
- The 1-in-20 Rule: How to Forage Without Depleting the Patch?
- Spring Shoots or Fall Roots: When Is the Best Time to Forage Near Rivers?
- Ticks and Mosquitoes: How to Forage Deep in the Brush Without Getting Bitten?
- The Death Cap: How to Distinguish It from Edible Paddy Straw Mushrooms?
- Stagnant vs Flowing: How to Locate Safe Water When You Can’t See a River?
- Foraging for Survival: Which Common Plants Offer the Highest Caloric Density?
Water Hemlock vs Wild Carrot: The Distinctions That Save Your Life
In the world of foraging, there is no margin for error when it comes to the Apiaceae family. Wild Carrot (Daucus carota), also known as Queen Anne’s Lace, is a common edible. Its toxic cousin, Poison Hemlock (Conium maculatum), and even more so its deadly relative Water Hemlock (Cicuta maculata), are among the most poisonous plants in North America. A misidentification can be fatal. The responsibility of the forager is to prove a plant is safe, which means confirming the absence of all toxic characteristics. The invasive nature of these toxic plants is staggering; research shows that poison hemlock can produce up to 38,000 seeds per plant, allowing it to spread rapidly in the moist environments you’re likely to be foraging in.
Relying on a single feature is a recipe for disaster. True identification requires a systematic, multi-point check. You must be able to say with 100% certainty that the plant in your hand has hairy stems and a carrot-like smell, and lacks the smooth, purple-spotted stems of Poison Hemlock or the chambered root of Water Hemlock. This is not a casual process; it is a deliberate, forensic examination.
Checklist: Multi-Point Identification for Hemlock vs. Wild Carrot
- Stem Check: Wild carrot stems are densely covered with hairs; poison hemlock and water hemlock have smooth, hairless stems. Poison hemlock displays distinctive purple spotting on stems.
- Smell Test: Crush a small leaf or stem portion. Wild carrot (Queen Anne’s Lace) emits a distinct carrot smell. Poison hemlock has an unpleasant ‘mousy’ odor or no smell at all. Water hemlock lacks the carrot scent.
- Height Assessment: Wild carrot rarely exceeds 2-4 feet in height. Poison hemlock can reach 6-10 feet tall. Water hemlock typically grows 3-7 feet.
- Habitat Location: Hemlock species prefer wet, moist soil near streams and ditches. Wild carrot favors drier fields and roadsides with full sunlight.
- Leaf Structure Examination: Poison hemlock leaves are more triangular and finely divided. Wild carrot leaves are more linear, lacy, and less intricate.
The absolute rule is this: require a definitive ‘NO’ on all hemlock characteristics before proceeding. If there is uncertainty on even a single feature, the plant must be discarded. When in doubt, there is no doubt—leave it alone.
Giardia on Greens: How to Wash Wild Harvests from Riparian Zones?
Identifying your plant correctly is only the first layer of safety in a riparian environment. The second, often-ignored threat is microbial. The water that nourishes these plants can also carry microscopic parasites from upstream animal feces or human runoff. The most notorious of these is Giardia lamblia, a protozoan that causes severe gastrointestinal illness. Assuming that a plant is clean just because it looks pristine is a dangerous gamble. Even treated wastewater can be a source of contamination; a study of wastewater treatment plants found from 79 to 2,469 Giardia cysts per liter in their treated effluent, highlighting the resilience and prevalence of this parasite in water systems.
Therefore, every single green harvested from the edge of a water source must be treated as potentially contaminated. This requires a decontamination protocol that goes far beyond a simple rinse. The goal is to mechanically remove, neutralize, and assess risks from pathogens and chemicals before anything is consumed.
The process of cleaning is as vital as the process of identification. The image of pure water beading on a fresh leaf should represent the end result of your diligent decontamination efforts, not the state in which you found it.
Checklist: Three-Step Decontamination Protocol for Riparian Plants
- Mechanical Cleaning: Rinse harvested greens vigorously under clean, running water to remove surface dirt, debris, and potential parasite eggs. Most contaminants are ingested from dust or soil rather than absorbed by the plant.
- Pathogen Neutralization: For high-risk water sources, briefly blanching greens in boiling water for 1-2 minutes is the most effective way to destroy Giardia cysts and other pathogens. Heat is the most reliable neutralizer.
- Chemical Risk Assessment: Evaluate upstream land use. If industrial sites, intensive agriculture, or significant urban runoff are present, do not consume plants from that area. Certain plants can be hyperaccumulators of heavy metals, which cannot be washed or cooked away.
The 1-in-20 Rule: How to Forage Without Depleting the Patch?
A responsible forager’s mindset extends beyond personal safety to ecological stewardship. The goal is not just to take from nature, but to participate in it without causing harm. A thriving patch of wild edibles is an invitation, but it’s also a delicate system. Over-harvesting can decimate a local plant population, affecting the wildlife that depends on it and ensuring there is nothing left for future seasons. The vague advice to “not take too much” is unhelpful. A more precise, ethical framework is needed.
The principle of sustainable harvesting is based on a simple, memorable guideline. For many common plants, the Botanical Society of Britain and Ireland recommends taking no more than 5% of what is available. This is often simplified to the “1-in-20 rule”: for every 20 plants or plant parts you see, you may consider harvesting just one. This ensures that the vast majority of the patch remains to photosynthesize, reproduce, and support the local ecosystem. This rule must be further refined by considering which part of the plant you are harvesting, as the ecological impact varies dramatically.
The following matrix, based on common foraging ethics, shows how different plant parts have vastly different impacts on the plant’s survival and the time it takes for it to recover. As this comparative analysis of foraging impact illustrates, harvesting roots is a high-stakes action.
| Impact Tier | Plant Parts | Ecological Impact Level | Regeneration Time | Foraging Notes |
|---|---|---|---|---|
| Tier 1 (Low Impact) | Fruits, seeds, flowers, nuts | Minimal – plant survives harvest | Annual (next season) | Most sustainable option; helps seed dispersal when done ethically |
| Tier 2 (Medium Impact) | Leaves, shoots, stems | Moderate – reduces photosynthesis temporarily | Weeks to months | Harvest no more than 1/3 from a single plant; avoid over-harvesting the same plant |
| Tier 3 (High Impact) | Roots, rhizomes, bark, bulbs | Severe – often kills the plant | Years to never (plant death) | Use extreme caution; only harvest from abundant patches; consider leaving entirely |
Harvesting roots, rhizomes, or bark is the equivalent of a death sentence for the plant. This should only ever be considered in vast, abundant patches and with extreme discretion, or in a true survival situation. For most foraging, sticking to Tier 1 and 2 harvests is the cornerstone of ethical practice.
Spring Shoots or Fall Roots: When Is the Best Time to Forage Near Rivers?
Beyond identifying *what* to harvest and *how much* to take, the expert forager understands *when* to harvest. A plant is not a static resource; it is a dynamic living organism that changes throughout the seasons. Its energy, nutrients, and chemical compounds are in constant flux, a process known as phenology. Understanding a plant’s life cycle allows you to harvest the most nutritious and palatable parts at their peak, while also respecting the plant’s needs.
In general, a plant’s energy is directed upwards in the spring, producing tender, vitamin-rich shoots and leaves. This is the optimal time to harvest greens. As the season progresses into summer, energy is put into flowering and fruiting. In the fall, as the upper parts of the plant die back, that energy is sent downwards and stored in the roots and rhizomes as starches and sugars for winter survival. This makes fall and winter the ideal time to harvest energy-dense roots, provided it’s done sustainably.
The same plant can offer completely different types of food depending on the time of year, a concept perfectly illustrated by a common riparian resident.
Case Study: Cattail as a Multi-Season Foraging Example
Cattails (Typha spp.) demonstrate the nutritional shift concept throughout the seasons in riparian zones. In early spring, young cattail shoots emerge as tender vegetables rich in vitamins. By early summer, the male flower heads (before pollen release) can be harvested and cooked like corn on the cob. In late fall and winter, energy concentrates in the starchy rhizomes (underground stems), which become a prime caloric source containing stored sugars and starches. This single plant offers different edible resources at different phenological stages, illustrating how plant energy and chemical composition change seasonally. Each part requires different harvesting techniques and provides distinct nutritional profiles aligned with the plant’s life cycle.
Ticks and Mosquitoes: How to Forage Deep in the Brush Without Getting Bitten?
The final layer of risk management in riparian foraging has nothing to do with plants. The dense, moist, and overgrown environment that edible plants love is also a perfect breeding ground for disease-carrying insects like ticks and mosquitoes. Pushing through thick brush to reach a promising patch of fiddleheads or wild ginger puts you at high risk for bites that can transmit Lyme disease, West Nile virus, and other serious illnesses. A successful foraging trip is one you return from healthy, which means protecting yourself from these vectors is not optional.
A passive approach is insufficient. An effective defense requires a proactive, multi-layered strategy that creates barriers and uses repellents systematically. Thinking in terms of “concentric circles of defense” helps to ensure all bases are covered, from the gear you wear to the checks you perform after returning home. This structured approach moves personal protection from an afterthought to a core component of your foraging protocol.
Checklist: Concentric Circles of Defense Strategy for Foragers
- Outer Circle (Gear Defense): Treat clothing and boots with 0.5% permethrin. Wear light-colored clothing to spot ticks easily. Tuck pants into socks and shirts into pants to create physical barriers against crawling pests.
- Middle Circle (Repellent Application): Apply an EPA-registered insect repellent containing DEET, picaridin, or Oil of Lemon Eucalyptus to all exposed skin and clothing edges. Reapply as directed, especially after sweating.
- Inner Circle (Movement Awareness): Walk in the center of trails where possible. Use a walking stick to part vegetation instead of your hands. Avoid sitting directly on the ground or on logs in brushy areas.
- Post-Forage Protocol (Systematic Check): Within two hours of returning, shower and conduct a full-body tick check, paying close attention to hair, armpits, behind knees, and the groin area. Tumble dry your foraging clothes on high heat for 10 minutes to kill any ticks that may have hitched a ride.
Ignoring these small but persistent threats can have long-term health consequences that far outweigh the benefits of any wild harvest. This protocol should be as ingrained as your plant identification checks.
The Death Cap: How to Distinguish It from Edible Paddy Straw Mushrooms?
While this guide focuses on greens, no discussion of foraging dangers is complete without addressing mushrooms. The riparian woods can host a variety of fungi, and the penalty for misidentification is swift and severe. The most infamous is the Death Cap (Amanita phalloides), which has edible lookalikes like the Paddy Straw mushroom. With mushrooms, the stakes are so high that many expert foragers simply avoid gilled mushrooms altogether. As one expert warns, it’s a domain best left to the truly experienced.
Because there are so many varieties out there, you really have to be an expert. I tell people to avoid them, just because there are enough other options out there to forage. With mushrooms, you can get liver toxicity, which can be fatal.
– Julia Czerwony, RD, Cleveland Clinic
For those who do choose to engage, there is a non-negotiable checklist of features that scream “Amanita” and therefore “potentially deadly.” Seeing even one of these features should be a hard stop. The process is not about proving it’s edible; it’s about definitively proving it is *not* a deadly Amanita.
Checklist: Anatomy of an Amanita – Universal Warning Signs
- Feature 1: Volva (Cup) at Base: Deadly Amanitas grow from a sac-like cup at the base, which is often underground. You must gently dig around the entire base to confirm its absence or presence. Never pick a mushroom without its complete base.
- Feature 2: Free Gills: The gills underneath the cap of an Amanita are “free,” meaning they do not attach to the stem.
- Feature 3: White Spore Print: All deadly Amanitas have a white spore print. To check, place the cap on dark paper for several hours. This is a mandatory step for any gilled mushroom.
- Feature 4: Ring (Annulus) on Stem: Most deadly Amanitas have a skirt-like ring on the upper part of the stem.
If a mushroom displays these characteristics—a volva, a ring, free gills, and a white spore print—it must be treated as a deadly poison. There are no shortcuts and no room for guessing games.
Stagnant vs Flowing: How to Locate Safe Water When You Can’t See a River?
The knowledge of a riparian forager can be a powerful survival tool, extending beyond just finding food. The same plants that you seek for sustenance can also act as indicators for a far more critical resource: water. In a landscape where a water source isn’t immediately visible, knowing how to read the vegetation can guide you to hidden springs, seeps, or underground water tables. You can use your foraging knowledge in reverse: if you’re looking for cattails, you search for water; if you’re looking for water, you can search for cattails and other water-loving plants.
This technique relies on understanding a class of plants known as phreatophytes, which are nature’s own water-dowsers. Their presence is a reliable sign of water close to the surface, even in an otherwise dry-looking area.
Case Study: Using Indicator Plants as Water Dowsers
Phreatophytes are plants with deep root systems that tap into the groundwater table, making them excellent indicators of subsurface water. Key species, many of which are common in riparian foraging zones, include cottonwoods (Populus spp.), willows (Salix spp.), and alders (Alnus spp.). When you spot a dense, green cluster of these trees in an arid landscape or a “green line” snaking down a hillside, it almost certainly marks the location of an underground spring, seep, or shallow water table. This botanical knowledge is bidirectional: finding these trees can lead a survivor to water, and finding a water source confirms a prime habitat to search for edible riparian plants.
This synergy between finding food and finding water is a hallmark of deep ecological knowledge. It transforms the landscape from a collection of individual items into an interconnected system of signs and resources. Remember, however, that even water found this way must be purified before drinking, just as the plants near it must be decontaminated before eating.
Key takeaways
- Systematic Identification is Everything: Safe foraging is not about recognizing edibles, but about mastering a rigorous process to definitively rule out toxic mimics like Water Hemlock and Death Cap mushrooms.
- Riparian Means Risk: Any plant harvested near water must be assumed to carry microbial threats like Giardia and requires a specific, multi-step decontamination protocol involving heat.
- Harvest with Restraint: True sustainability is based on concrete rules, like the “1-in-20” guideline and understanding the severe impact of harvesting roots, to ensure the long-term health of a patch.
Foraging for Survival: Which Common Plants Offer the Highest Caloric Density?
In a true survival scenario, the calculus of foraging changes dramatically. The goal is no longer taste or variety, but pure caloric efficiency. Not all edible plants are created equal. A forager could spend all day gathering and eating low-calorie greens and still suffer from a net energy loss. Survival foraging requires prioritizing plants that offer the highest caloric density for the least amount of energy expenditure, and this often means focusing on starches, fats, and sugars—the foundational tiers of the wild food pyramid.
This shifts the focus from tender leaves to starchy roots, rhizomes, and energy-packed nuts. However, these high-calorie foods often come with a catch: they frequently require specialized knowledge and significant processing to become safely edible and unlock their nutritional potential.
| Pyramid Tier | Food Category | Example Plants | Caloric Value | Foraging Effort | Survival Priority |
|---|---|---|---|---|---|
| Bottom Tier (Foundation) | High-energy starches and fats | Cattail rhizomes, burdock roots, acorns, walnuts, hickory nuts | High (300-500+ cal/100g for nuts) | High effort, requires processing | Critical – provides sustained energy and essential fats |
| Middle Tier | Sugars and simple carbohydrates | Berries, wild fruits, maple sap | Medium (40-80 cal/100g) | Low to medium effort, seasonal | Important – quick energy, hydration |
| Top Tier (Supplement) | Green vegetables | Leaves, shoots, wild greens (dandelion, plantain) | Low (15-50 cal/100g) | Low effort, widely available | Supportive – vitamins, minerals, but minimal calories |
This pyramid illustrates why an expert survivor might walk past a field of delicious-looking greens to spend hours processing acorns. The caloric return is simply on another level.
Case Study: Acorn Processing – Unlocking Calories Through Knowledge
Acorns are a prime example of a high-calorie wild food (approx. 387 calories per 100g) that is inedible without processing. They contain high levels of tannins, which are astringent and toxic in quantity. To make them edible, these tannins must be leached out. This is typically done by crushing the acorns and repeatedly soaking them in cold water (changing the water until it’s no longer brown) or by boiling them multiple times. Only after this labor-intensive process can the acorns be dried and ground into a nutrient-dense flour. This demonstrates that the most valuable survival foods often require the most knowledge, turning an abundant but inedible resource into a life-saving meal.
Begin by practicing these identification and assessment techniques in the field without harvesting. True expertise is built on patient observation, systematic caution, and a deep respect for both the bounty and the power of the natural world.