Achieving clean astrophotos isn’t about avoiding high ISO; it’s about mastering your camera’s Signal-to-Noise Ratio (SNR) at a fundamental level.
- Maximizing incoming light (signal) through precise exposure rules (NPF) and wide apertures is more critical than lowering ISO.
- Understanding your sensor’s specific “ISO Invariant” behavior reveals the optimal settings for gathering data, which may not be the lowest ISO.
- Image stacking is not just a trick; it’s a mathematical process that systematically cancels out random noise, dramatically improving image quality.
Recommendation: Stop fearing high ISO and start thinking like a physicist: your goal is to collect the maximum number of photons while understanding and mitigating the specific noise characteristics of your sensor through both capture technique and post-processing.
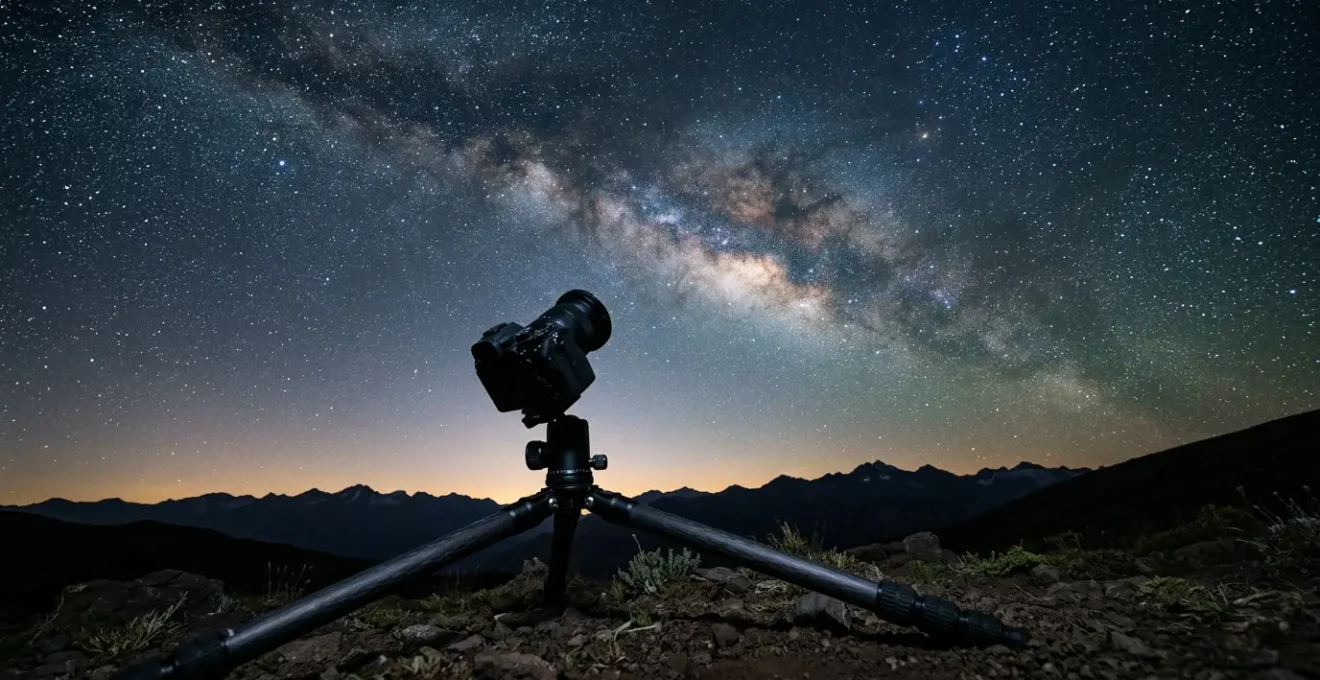
For any amateur photographer who has pointed their camera at the night sky, the result is often a mix of awe and frustration. You capture the faint, majestic arc of the Milky Way, but it’s swimming in a sea of digital “grain” or noise. The common advice—”just lower your ISO”—is a frustrating oversimplification, as it often leads to dark, underexposed images or streaks from star trails. This generic guidance fails to address the core physics of digital photography.
The truth is, high ISO settings are a necessary tool, not an enemy to be avoided. The real key to professional-grade clarity lies not in simple settings changes, but in a deeper understanding of the battle between signal and noise. The “signal” is the precious light from distant stars and nebulae, and the “noise” is the electronic interference generated by your camera sensor. Your mission is to maximize the Signal-to-Noise Ratio (SNR) at every single step.
But if the secret isn’t just about the ISO button, where is it? It’s in a holistic approach that treats your camera not as a magic box, but as a scientific instrument for collecting photons. This guide will deconstruct the process, moving from foundational principles of exposure to the advanced sensor characteristics and processing techniques that truly separate a noisy snapshot from a clean, breathtaking masterpiece. We’ll explore how to calculate precise shutter speeds, why aperture choice involves more than just light, how to leverage the mathematics of image stacking, and how to understand the “ISO Invariant” nature of your specific camera sensor.
This article provides a structured path to mastering noise reduction in your night sky photography. Below, the summary outlines the key technical areas we will delve into, from fundamental exposure rules to advanced environmental challenges, providing a comprehensive roadmap to achieving pristine celestial images.
Summary: A Technical Roadmap to Noise-Free Night Sky Images
- The 500 Rule vs NPF Rule: Which Formula Prevents Star Trails?
- Aperture Matters: Why f/2.8 is the Minimum for Night Sky Clarity?
- Post-Processing: How to Stack 10 Images to Reduce Grain?
- Dew Heaters: How to Keep Your Lens Clear in Humid Night Air?
- ISO 1600 vs 6400: Is Your Camera Sensor ISO Invariant?
- Bortle Scale 1 vs 3:Navigating Ancient Boreal Forests: How to Find Your Way When GPS Fails?
- Why Your Auto-Mode Fails in the Forest and How to Fix It?
- Staying in Nordic Glass Domes: Is the Price Worth the View of the Aurora?
The 500 Rule vs NPF Rule: Which Formula Prevents Star Trails?
The first step in improving your Signal-to-Noise Ratio is maximizing your signal—the light—without introducing motion blur from the Earth’s rotation. This means using the longest possible shutter speed before stars begin to appear as trails instead of pinpoints. For years, the “500 Rule” (500 divided by your lens’s focal length) was the go-to guideline. However, this rule is a relic from the film era and is dangerously inaccurate for modern high-resolution digital cameras. It completely ignores factors like sensor size, pixel density, and aperture, which all affect how quickly trailing becomes visible.
Enter the NPF Rule. This more complex but far more accurate formula considers not just focal length, but also pixel pitch (the size of your individual pixels) and aperture. The result is a much shorter, more conservative, and more realistic shutter speed recommendation. For an amateur frustrated with even slight trailing in their images, switching to the NPF Rule is a game-changer. The improvement in sharpness is immediately noticeable, especially when viewing images at 100% or making large prints. For modern cameras, the NPF rule is significantly more accurate, particularly for sensors with 40-60+ megapixels where tiny imperfections are magnified.
Action Plan: Find Your Lens’s True Star Trailing Threshold
- Set up your camera on a stable tripod pointing toward the celestial equator (Orion’s belt region is a good target in the Northern Hemisphere).
- Use your widest aperture (e.g., f/2.8) and a moderately high ISO (1600-3200) to get quick results for this test.
- Take a series of test shots, increasing the shutter speed by 2-second intervals for each shot (e.g., 10s, 12s, 14s, 16s, 18s, 20s).
- Review the images on your computer at 100% magnification, paying close attention to the corners of the frame where trailing and lens aberrations appear first.
- Identify the longest exposure time before stars begin to visibly elongate. For a safe margin, use a shutter speed that is 10-15% shorter than this identified threshold for your actual imaging session.
While online calculators for the NPF rule are a great starting point, performing this hands-on test for each of your lenses provides the most precise data for your specific gear. This personalized shutter speed becomes the foundation of your exposure, ensuring you collect the maximum number of photons without compromising sharpness.
Aperture Matters: Why f/2.8 is the Minimum for Night Sky Clarity?
After determining your maximum sharp shutter speed, the next lever for maximizing your signal (photon collection) is the aperture. In astrophotography, the mantra is often “faster is better,” meaning a wider aperture (a lower f-number like f/1.4 or f/1.8) is highly desirable because it allows the sensor to collect more light in the limited time available. A lens at f/1.4 collects four times more light than a lens at f/2.8 in the same amount of time. This dramatic increase in photon flux directly improves your Signal-to-Noise Ratio before the signal even hits the sensor.
So why is f/2.8 often cited as a practical minimum or “sweet spot”? The answer lies in the trade-off between light-gathering and optical quality. While extremely fast lenses (f/1.8 and wider) are photon-gathering beasts, they are often optically imperfect when used wide open. They can suffer from severe optical aberrations, particularly coma and astigmatism, which distort pinpoint stars in the corners of the frame into distracting seagull or cross shapes. This degrades the very clarity you’re trying to achieve.
As experts at Photography Life explain when analyzing lens flaws, stopping down to about f/2.0 or f/2.8 can dramatically improve its coma performance. High-quality zoom or prime lenses designed for astrophotography are often engineered to perform exceptionally well at or near f/2.8, offering a fantastic balance. They provide excellent light transmission while keeping aberrations like coma under control across most of the frame. For a hobbyist on a budget, an f/2.8 lens represents the most effective entry point into high-quality night sky imaging, prioritizing optical sharpness while still gathering a substantial amount of light.
Post-Processing: How to Stack 10 Images to Reduce Grain?
Once you’ve optimized your photon collection in the field, the next frontier in the war on noise is post-processing. The single most powerful technique is image stacking. This process involves taking multiple identical exposures of the same scene (called “light frames”) and then using specialized software to align and average them. The principle is based on a simple mathematical truth: the light signal from the stars is consistent in every frame, while the digital noise (read noise, thermal noise) is random. When you average the frames, the consistent signal gets stronger, and the random noise, with its positive and negative variations, begins to cancel itself out.
The improvement in the Signal-to-Noise Ratio (SNR) is proportional to the square root of the number of frames (N). As a practical stacking guide demonstrates, this means stacking just 10 exposures reduces random noise by a factor of approximately 3.16 (the square root of 10). Stacking 25 frames reduces noise by a factor of 5. This is a dramatic, “free” improvement in image quality that requires no new hardware, only a change in shooting methodology. While stacking more frames continues to help, there are diminishing returns, and for most photographers, a stack of 10-20 light frames provides a massive leap in quality.
To perform this magic, you need stacking software. For landscape astrophotography, two popular free options are Sequator and DeepSkyStacker. Sequator is often preferred by beginners as it’s faster and has an intuitive “Freeze Ground” feature that allows you to stack the sky and foreground separately in one easy step.
| Feature | Sequator | DeepSkyStacker |
|---|---|---|
| Platform | Windows only | Windows only |
| Price | Free | Free |
| Landscape foreground handling | Excellent (Freeze Ground mode) | Poor (sky only) |
| Calibration frames support | Dark frames, vignetting correction | Dark, Bias, Flat, comprehensive |
| Speed | Very fast (2-3 minutes for 50+ frames) | Slower (can take 10+ minutes) |
| Ease of use | Beginner-friendly, intuitive interface | More complex, steeper learning curve |
| Best use case | Milky Way & nightscapes with foreground | Deep-sky objects & tracked imaging |
| RAW format support | Yes (most major formats) | Yes (most major formats) |
Dew Heaters: How to Keep Your Lens Clear in Humid Night Air?
You can have the most precise exposure settings and the most advanced sensor, but if your signal—the light from the stars—is blocked before it even enters your camera, your final image will be ruined. One of the most common and insidious signal blockers is dew. As the temperature drops during a long imaging session, the front element of your lens can cool below the dew point, causing moisture to condense on it. This subtle fogging slowly degrades contrast and sharpness, eventually turning your pinpoint stars into soft, blurry blobs. It’s a silent killer of astrophotos, especially in humid conditions.
The professional solution is a dew heater. This is a simple, electrically powered strap that wraps around your lens barrel. It gently warms the lens just a few degrees above the ambient temperature, enough to prevent condensation from forming without introducing heat currents that could distort the image. These are typically powered by a small, portable USB power bank. Sizing this power source correctly is key to ensuring it lasts for an entire night of shooting.
As one real-world power consumption test of a full astrophotography rig shows, USB dew heaters represent a minimal power draw compared to heavy-duty equipment like cooled cameras and large mounts. For a typical photographer, a standard 20,000mAh power bank is more than sufficient to power a dew heater for one or even two nights. This small investment protects your primary investment: your time under the stars and the quality of the photons you’re trying to collect. It ensures that the signal path from the cosmos to your sensor remains crystal clear all night long.
Action Plan: Sizing a USB Power Bank for All-Night Dew Heater Operation
- Calculate your dew heater’s power consumption. A typical USB dew heater strip draws between 4-6 Watts at 5 Volts.
- Estimate your session duration. For an 8-hour night, a single 5W heater will consume about 40 Watt-hours (8 hours × 5W).
- Account for all devices. If you’re running heaters on both your main lens and a guide scope, you’ll need at least 80Wh.
- Add a safety margin of 30-40% to account for the power bank’s own efficiency losses and reduced capacity in cold temperatures. A 100Wh total capacity is a safe target.
- Choose an appropriate power bank. For this need, a power bank rated at a minimum of 20,000mAh (which is approximately 100Wh at 5V) is a reliable choice. As a low-tech backup, chemical hand warmers can be attached with rubber bands, but care must be taken to not shift the lens focus.
ISO 1600 vs 6400: Is Your Camera Sensor ISO Invariant?
Here we arrive at the most misunderstood setting in astrophotography: ISO. The common belief is that high ISO creates noise. This is technically incorrect. High ISO doesn’t *create* noise; it *amplifies* the noise that is already present in the signal from the sensor. The more critical concept to understand is ISO invariance. A sensor is considered “ISO invariant” (or more accurately, “read noise invariant”) if, after a certain point, increasing the ISO in-camera produces the same image quality as shooting at a lower ISO and “pushing” the exposure in post-processing.
Why does this matter? It means that for many modern cameras (most Sony, Fuji, and newer Canon models), there is little to no penalty for using a high ISO like 6400 versus a lower one like 800 or 1600. The underlying noise, specifically the read noise generated when the sensor’s signal is read out, is already so low at the base ISO that the main factor becomes collecting enough light to overcome it. For these sensors, it’s better to use a high ISO to get a bright-enough histogram on the back of your camera (a technique known as Expose to the Right, or ETTR), rather than shooting a dark frame at a low ISO and brightening it later, which only amplifies the read noise in software.
Many sensors have a “dual-gain” architecture, where at a certain ISO threshold (e.g., ISO 640 or 800), the camera’s electronics switch to a different amplification circuit that dramatically drops the read noise. Identifying this threshold for your specific camera is key to optimizing your settings. Shooting at or just above this dual-gain ISO often provides the cleanest results. The only way to know for sure is to test your own camera. A comprehensive ISO test protocol is essential for discovering your camera’s optimal settings and truly understanding its behavior.
Action Plan: Test Your Camera for ISO Invariance
- Set your camera to manual mode, shoot in RAW, and disable all in-camera noise reduction (both Long Exposure NR and High ISO NR).
- Create a test scene with a mix of deep shadows and bright highlights, like a lamp in an otherwise dark room.
- Shoot a “correctly” exposed RAW file at a base ISO like 800. Note the shutter speed and aperture.
- Without changing aperture or shutter speed, shoot a second, intentionally underexposed frame at a lower ISO like 400. This image will appear darker.
- In your RAW editing software (like Lightroom or Camera RAW), increase the exposure of the ISO 400 file by +1 stop to match the brightness of the ISO 800 file.
- Compare the noise in the shadow areas of both images at 100% magnification. If the pushed ISO 400 file looks as clean or cleaner than the native ISO 800 file, your sensor is ISO invariant in that range.
- Repeat this test across your camera’s ISO range (e.g., comparing ISO 1600 to a pushed ISO 800) to find the point where it no longer matters whether you use the in-camera amplification (higher ISO) or software amplification (pushing exposure).
Bortle Scale 1 vs 3:Navigating Ancient Boreal Forests: How to Find Your Way When GPS Fails?
Your strategy for managing the Signal-to-Noise Ratio is not executed in a vacuum; it is profoundly influenced by your environment. The single biggest environmental factor in astrophotography is ambient light pollution, which is quantified by the Bortle Scale. This scale runs from Class 1 (a pristine, pitch-black sky, like a remote desert) to Class 9 (a heavily light-polluted inner-city sky). The amount of background light pollution directly impacts your settings and noise-reduction strategy.
Under a Bortle 1 sky, the heavens are so dark and the Milky Way so bright that you have a very high signal (starlight) and very low noise (light pollution). In this ideal scenario, you can often get away with using a lower ISO (e.g., 800-1600) because the signal is so strong. The main challenge here can be differentiating faint natural phenomena from noise. For instance, a phenomenon called airglow—a faint emission of light by a planetary atmosphere—can appear as green or reddish bands in your long exposures. This is not sensor noise; it’s a real signal from the upper atmosphere. Experienced photographers learn to identify it by its consistent, structured appearance across multiple frames, unlike the random speckling of sensor noise.
As you move to a Bortle 3 or 4 sky (a typical rural or suburban-transition area), the background sky starts to glow with a faint orange or yellow hue from distant city lights. This light pollution adds a base level of “noise” to your image. To overcome this, you need to adjust your strategy. You’ll likely need to increase your ISO (e.g., 3200-6400) to ensure the faint starlight signal is strong enough to stand out against the skyglow. Your shutter speed might also need to be slightly shorter to prevent the skyglow from completely washing out the image. Here, aggressive stacking becomes even more crucial to average out both the sensor noise and the background light pollution.
| Bortle Scale | Sky Condition | Recommended ISO | Aperture | Shutter Speed (20mm) | Noise Strategy |
|---|---|---|---|---|---|
| Bortle 1 | Pristine dark sky, Milky Way visible overhead | 640-1600 | f/2.8 or wider | 15-20s (NPF Rule) | Lower ISO possible due to abundant starlight; prioritize shadow detail |
| Bortle 2-3 | Rural sky, Milky Way clearly visible | 1600-3200 | f/2.0-f/2.8 | 13-18s (NPF adjusted) | Moderate ISO to compensate for slight light pollution; balance noise vs. sky glow |
| Bortle 4-5 | Suburban/rural transition, Milky Way faintly visible | 3200-6400 | f/1.4-f/2.8 | 10-15s | Higher ISO required; aggressive stacking (15+ frames) essential for noise control |
| Bortle 6+ | Urban sky, Milky Way not visible | Not recommended for Milky Way imaging | N/A | N/A | Focus on light pollution filtering and stacking techniques; consider tracked imaging |
Why Your Auto-Mode Fails in the Forest and How to Fix It?
To implement a robust SNR strategy, you must seize full manual control of your camera. Your camera’s automatic modes are designed for daytime scenes with plenty of light and are utterly useless for the low-light, high-precision demands of astrophotography. They make a series of “helpful” assumptions and apply automated processing that actively destroys the very data you are trying to collect. To get clean night sky images, you must systematically disable these features.
The first culprits are in-camera noise reduction settings. Long Exposure Noise Reduction (LENR) sounds useful, but it works by taking a second, identical-length exposure with the shutter closed (a “dark frame”) immediately after your main shot. It then subtracts this dark frame from your image to remove hot pixels. As the team at AstroBackyard notes, this process “doubles your wait time and why shooting separate dark frames is superior.” It halves the amount of time you can spend collecting precious light. Similarly, High ISO Noise Reduction applies a waxy, smoothing algorithm that, even on RAW files in some cameras, smears away faint stars and delicate nebula details. Both must be turned off.
Beyond noise reduction, you must also disable autofocus, which will hunt endlessly in the dark and never achieve focus. Instead, switch to manual focus, use your camera’s live view, and magnify it 10x on a bright star to dial in perfect, sharp focus. Auto white balance is another feature to disable; it will try to “correct” the colors of the night sky, neutralizing the beautiful warm tones of the Milky Way core or the green hues of airglow. Set it manually to a Kelvin value between 3200K and 4000K for a more natural starting point.
Action Plan: Essential Manual Mode Settings for Astrophotography
- Disable Long Exposure Noise Reduction (LENR): This doubles your exposure time for no good reason. You will shoot separate dark frames later.
- Turn off High ISO Noise Reduction: This applies aggressive smoothing that destroys fine star detail. All noise reduction will be done in post-processing with more control.
- Switch to Manual Focus: Disable autofocus completely. Use live view magnified to 10x on a bright star to achieve critical focus.
- Set White Balance Manually: Use a fixed Kelvin temperature (e.g., 3800K) to ensure consistent color across all your light frames. Do not use Auto WB.
- Enable Histogram Display: Learn to “Expose to the Right” (ETTR) by pushing your histogram as far right as possible without clipping the highlights, which maximizes signal and buries shadow noise.
- Disable In-Camera Lens Corrections: Turn off corrections for distortion, vignetting, and chromatic aberration. These are better and more precisely applied in post-processing.
Key Takeaways
- Master the NPF rule and a wide aperture (f/2.8) to maximize incoming photons (signal) without introducing star trails or optical flaws.
- Embrace image stacking as a mathematical tool. Averaging 10-20 frames is the single most effective way to improve your Signal-to-Noise Ratio by canceling out random electronic noise.
- Test your camera for ISO Invariance. Understanding if it’s better to use a higher ISO in-camera or push a lower ISO in post is critical for optimal data capture with your specific sensor.
Staying in Nordic Glass Domes: Is the Price Worth the View of the Aurora?
Applying astrophotography principles in a unique and challenging environment, like shooting the aurora borealis from inside a heated glass dome in the Nordics, is a true test of mastery. This scenario presents a set of specific problems that can completely ruin your images if not anticipated. The primary challenges are internal reflections from the glass and optical distortions caused by the temperature difference between the warm interior and the freezing arctic exterior.
Reflections are the most obvious enemy. Any light inside the dome—from a phone screen, a charging indicator LED, or even the room’s ambient lighting—will reflect off the curved glass and appear as ghostly flares or overlays on your final image. The solution requires absolute light discipline. All interior lights must be turned off, and you must prevent your camera from seeing any residual light. A “lens skirt,” a simple piece of black cloth draped from your lens to the glass, is essential. It creates a dark tunnel that blocks stray reflections from hitting your lens.
The second, more subtle issue is heat haze. The domes often have heated glass to prevent snow and ice buildup. This creates a significant temperature differential between the glass and the frigid outside air, which can generate a layer of turbulent air right in front of your lens. This “heat haze” will soften the image and make stars appear to shimmer or bloat, reducing sharpness. Shooting as perpendicular (90 degrees) to the glass surface as possible helps minimize this and other optical distortions like refraction. Mastering this controlled environment requires combining all core principles: a solid tripod, manual settings, and a deep understanding of how to protect your signal path from unique, localized sources of interference.
Action Plan: Eliminating Reflections and Distortion in a Glass Dome
- Create a Lens Skirt: Use a dark t-shirt, jacket, or dedicated lens hood to form a light-proof seal between your camera lens and the glass pane, blocking all internal reflections.
- Enforce Total Blackout: Turn off every single light source inside the dome, including phone screens, laptop LEDs, and any decorative lights, at least 15 minutes before shooting.
- Shoot Perpendicular to the Glass: Position your camera so the lens is as close to a 90-degree angle with the glass surface as possible. This minimizes refraction and distortion.
- Monitor for Heat Haze: Be aware that heated glass can create thermal currents. If stars look blurry or “wavy,” try moving to a different, non-heated pane if available.
- Balance Your Exposure: The aurora is bright and dynamic, often requiring a short shutter speed (1-5 seconds). Expose for the aurora first, knowing you can blend in a separate, longer exposure for the stars if needed.
- Establish a ‘Dark Zone’: Designate one area of the dome as the shooting zone and maintain strict light discipline. Use only a dim red headlamp when absolutely necessary to adjust settings.
By shifting your mindset from fearing ISO to mastering the Signal-to-Noise Ratio, you transform your camera from a point-and-shoot device into a precision instrument. Start applying these technical principles one by one, and you will see a dramatic, quantifiable improvement in the clarity and quality of your astrophotography.