Your rental inspection is not about finding cosmetic dings; it’s a pre-mortem analysis to identify the mechanical liabilities that will strand you on the trail and empty your wallet at the counter.
- Credit card insurance often has “pavement clauses” that void coverage on the very dirt roads you plan to drive.
- A missing or useless spare tire is a common, trip-ending oversight you are responsible for verifying.
Recommendation: Adopt a mechanic’s suspicious mindset. Document every potential failure point with video before the vehicle moves an inch—it’s your only reliable defense against blame for pre-existing neglect.
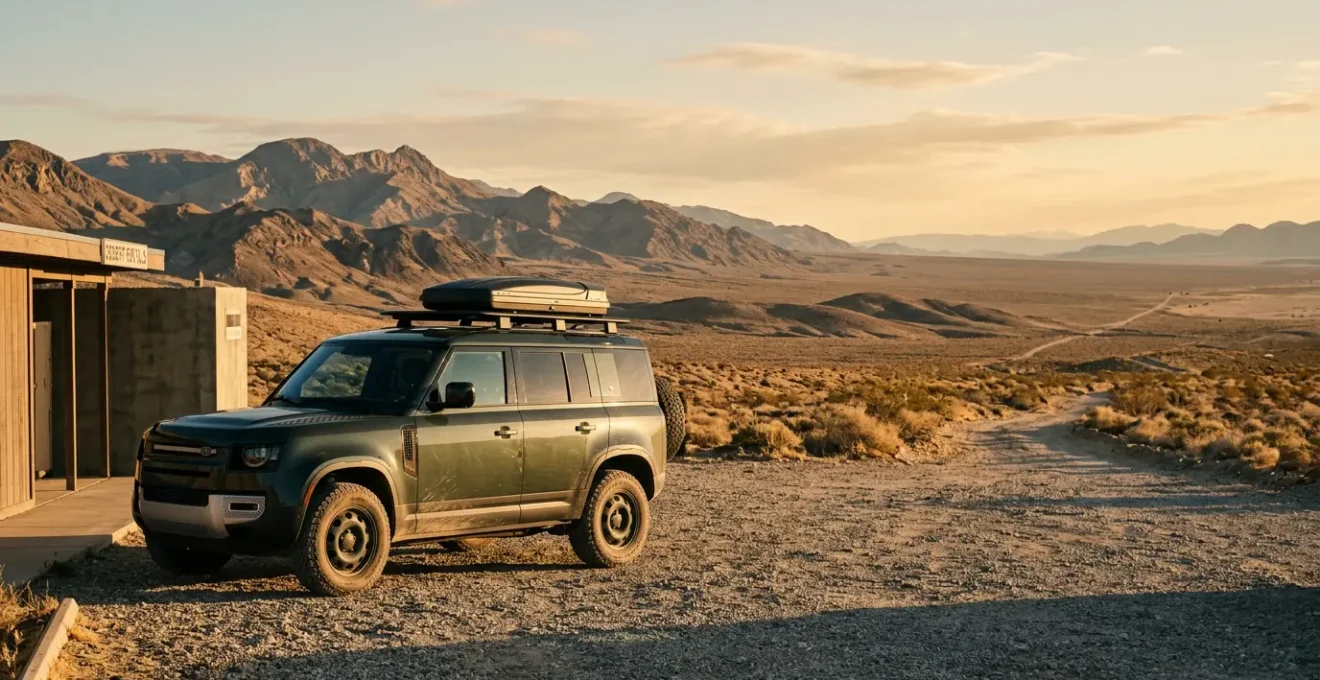
You’re standing on the hot asphalt of a rental lot, keys in hand. The 4×4 in front of you has seen better days—faded plastic, a few dings in the fender. But the trail is calling. The common advice is to “take photos of damage,” a flimsy ritual that barely scratches the surface. This approach assumes the rental company is just worried about new dents. That’s a mistake. A real inspection isn’t a cosmetic tour; it’s a mechanical interrogation.
As a mechanic, I don’t see a vehicle; I see a collection of potential failure points and financial liabilities. The rental agent’s job is to move metal. My job is to find the hairline crack, the worn-out part, the missing tool that turns a backcountry adventure into a tow-truck nightmare and a credit card dispute you’re guaranteed to lose. The most expensive problems are rarely the ones you can see at a glance.
Forget the superficial walk-around. We’re going to conduct a pre-trip audit. This guide will teach you to think like a mechanic, arming you with a suspicious eye and a systematic checklist. We’ll dissect insurance loopholes, verify the tools that actually matter, and understand the physics of what breaks a truck on a rough road. This isn’t about being paranoid; it’s about being prepared. Your goal is to leave the lot with a vehicle that’s trail-ready and to return it without being blamed for the neglect it arrived with.
This article provides a systematic approach, a mechanic’s checklist for your 4×4 rental inspection. Follow these sections to ensure you’re covered from the counter to the trailhead and back.
Table of Contents: A Systematic 4×4 Rental Inspection
- Pavement Clause: Does Your Credit Card Cover Damage on Dirt Roads?
- The Key Swap: How to Arrange a Car Drop for Point-to-Point Hikes?
- Jack and Spare: Is the Rental Equipped to Change a Tire on Dirt?
- Washboard Roads: How Speed Affects Vibration and Control?
- Airport to Trailhead: How Much Buffer Time Do You Need for Rental Counters?
- The High Point: How to Drive Over Rocks Without Smashing the Differential?
- Jump Starter Packs: Why You Can’t Rely on Jumper Cables at Empty Trailheads?
- Booking Unusual Lodging: What Insurance Covers a Stay in a Converted Silo or Cave?
Pavement Clause: Does Your Credit Card Cover Damage on Dirt Roads?
The first line of defense you’re told to rely on is your credit card’s rental insurance. This is a dangerous assumption. Most policies are written for city driving, not for the backcountry. They contain what’s known as a “pavement clause,” an exclusion that can void your coverage the second your tires touch gravel. You cannot assume you are covered. In fact, you should assume you are not.
This isn’t a minor detail; it’s the central loophole that rental companies and insurers use. A 2025 study found that 18% of credit card rental car insurance policies explicitly refuse to cover damage that happens on a dirt or gravel road. Others use vague language like “unmaintained roads” or “off-road use” to deny claims, leaving you fully liable for a busted oil pan or a cracked windshield. Your premium card’s “primary coverage” means nothing if you’ve violated the terms of the rental agreement by driving where they say you shouldn’t.
To verify your actual coverage, you must do the work yourself:
- Call your credit card issuer and ask specifically about coverage on ‘unpaved’, ‘unmaintained’, ‘gravel’, or ‘dirt’ roads. Use their exact terminology. Do not accept a generic “yes, you’re covered.”
- Email the specific rental branch—not the corporate 800 number—with the name of the trail or road you plan to use. Request written confirmation that driving this route is permitted under the rental agreement.
- Understand if your coverage is primary (pays first) or secondary (pays after your personal insurance). Even primary coverage can be voided by violating the rental terms.
- If there’s any ambiguity, consider a specialized third-party insurer. Companies like RentalCover.com or Bonzah explicitly cover 4x4s and unpaved roads, offering clearer terms than the fine print on your cardholder benefits guide.
Trusting a generic policy document is the fastest way to get stuck with a multi-thousand-dollar repair bill for a vehicle that isn’t yours.
The Key Swap: How to Arrange a Car Drop for Point-to-Point Hikes?
A point-to-point hike presents a logistical nightmare: your car is at one end, and you’ll be at the other. The classic, high-risk solution is the “key swap,” where you hand your keys to a stranger, a hitchhiker, or an acquaintance. This is a massive liability. You are authorizing an uninsured, unknown driver to operate a vehicle you are financially responsible for. A better system is required.
The professional solution is a dedicated vehicle shuttle service. In a case study from Colorado, Maroon Bells Shuttles operates a specialized transport service for hikers traversing the wilderness between Aspen and Crested Butte. They pick up your vehicle at the starting trailhead and drive it to the finish, often having it parked and waiting before you arrive. This eliminates the liability of unauthorized drivers and provides secure, professional handling of your rental.
If a professional service isn’t available, the next best option is a secure, no-contact key exchange using a mechanical lockbox. This method requires coordination but keeps control in your hands.
As shown, a heavy-duty contractor’s lockbox can be secured to a solid part of the vehicle’s frame, like a tow hook or frame rail. You leave a key inside and provide the combination to your hiking partner or a trusted contact who will retrieve the vehicle. This avoids handing keys to strangers and creates a more secure transfer process. However, you are still relying on another person’s driving. The risk is reduced, not eliminated.
Ultimately, the goal is to minimize the number of unknown variables. A professional shuttle is the most secure; a lockbox is a distant second.
Jack and Spare: Is the Rental Equipped to Change a Tire on Dirt?
Here is a fundamental truth of rental vehicles: you cannot assume anything. Especially not the presence of a functional spare tire. Car manufacturers have been quietly removing spares to save weight and cost, and rental agencies are not required to provide one. According to an industry analysis by AutoSlash, more than a third of new cars are sold without a spare tire. A flat tire on a remote dirt road is an inconvenience with a spare; without one, it’s a trip-ending disaster requiring an expensive, long-distance tow.
Your inspection of the spare tire and its associated tools is one of the most critical parts of the pre-trip audit. A “donut” or a can of fix-a-flat is not an acceptable substitute for a full-size spare on a 4×4 trip. You must physically inspect and verify every component yourself before you leave the lot.
Your Pre-Departure Tire & Tool Audit
- Locate the spare: Open the trunk, drop the tailgate, or look under the vehicle bed. Physically confirm a spare tire is present. Do not take the agent’s word for it.
- Verify tire type: It must be a full-size matching tire. A “donut” or temporary spare has severe speed and distance limitations (typically 50 mph / 50 miles) that make it useless for getting out of the backcountry.
- Check tire age: Find the DOT code on the sidewall. The last four digits represent the week and year of manufacture (e.g., ‘3218’ is the 32nd week of 2018). Rubber degrades over time; a tire over 10 years old, especially one exposed to the elements under a truck, is unreliable.
- Test tire pressure: Use your own gauge. Verify the spare is inflated to the manufacturer’s specification. Space-saver tires often require a much higher pressure (e.g., 60 PSI) than standard tires.
- Confirm jack and tools: Physically locate the jack, lug wrench, and any extension handles. Check the jack for visible leaks or damage. Crucially, take the lug wrench and test that it fits the lug nuts on the actual wheel. Mismatched tools are a common oversight.
- Find locking lug nut key: If the wheels have one oddly shaped lug nut, they have locking nuts. The key is a special socket adapter, usually in a plastic case in the glove box or with the jack. If this key is missing, you cannot change the tire. Period.
The rental company’s responsibility ends when you drive off the lot. After that, every piece of missing or broken equipment is your problem to solve.
Washboard Roads: How Speed Affects Vibration and Control?
Nothing tests the mechanical integrity of a vehicle like miles of washboard road. These rhythmic, corrugated ripples aren’t just uncomfortable; they are a destructive force, shaking loose components and causing a loss of steering and braking control. Understanding the physics of how they form reveals why they are so damaging.
The phenomenon was studied by nuclear physicist Dr. Keith Mather, who found that washboards are an unavoidable consequence of motion. In his research published in Scientific American, he noted:
Objects bouncing across a loose surface above a certain speed create irregularities in that surface. Each time a tire moves over those irregularities, it hops in the air and crashes down again.
– Dr. Keith Mather, Scientific American
This “hopping and crashing” is a high-frequency vibration that attacks every bolt, connection, and weld on your rental. The common wisdom is to either go very slow (under 10 mph) or fast enough (over 40 mph) to “skim the tops.” While skimming feels smoother, it drastically reduces tire contact with the road, compromising steering and braking. It also increases the violence of the vibrations. After a long stretch of washboard, a post-drive inspection is mandatory.
This repeating pattern translates into a violent shaking force. Here’s what you need to check after subjecting a vehicle to this abuse:
- Battery Terminals: Vibration is the enemy of electrical connections. Pop the hood and check that the battery terminals are tight. Look for any white or blue corrosive powder.
- Suspension Bolts: Look at the bolts on the shock absorbers, control arms, and sway bar links. The rapid vibration can cause them to back out.
- New Rattles: Listen. That new buzz from the dashboard or clank from the cargo area is an indicator that something has vibrated loose.
- Roof Rack & Skid Plates: If you have a roof rack, check its mounting points. Underneath, check that skid plate and heat shield bolts are still secure.
Treating washboard roads with mechanical respect will save you from a potential breakdown caused by a simple bolt vibrating loose.
Airport to Trailhead: How Much Buffer Time Do You Need for Rental Counters?
Your calculated trailhead arrival time can be completely derailed before you even get in the car. The choice between an on-airport rental location and an off-airport specialist has significant implications for your schedule, your vehicle quality, and your stress level. The convenience of an on-airport counter is often a mirage, masking long lines, limited vehicle selection, and rushed inspections.
Off-airport rental agencies, especially those specializing in 4x4s, often provide a superior experience for backcountry travel, despite requiring a shuttle. The staff is more knowledgeable, the vehicles are better equipped, and the atmosphere is less frantic, allowing for the detailed inspection this guide recommends. A direct comparison of the two options reveals critical trade-offs that impact your buffer time.
| Factor | On-Airport Location | Off-Airport Location |
|---|---|---|
| Convenience | Immediate access after landing, integrated with terminal | Requires shuttle bus (10-30 min) or taxi/rideshare |
| 4×4 Vehicle Selection | Limited true 4×4 options, mostly AWD SUVs | Better equipped 4x4s, often with off-road packages |
| Staff Knowledge | Generalist counter agents, high turnover | Specialized staff with off-road expertise and route advice |
| Pricing | Airport concession fees add 10-20% to base rate | Lower base rates but factor in shuttle/taxi cost |
| Wait Times (Peak) | 30-90 minutes during peak seasons at gateway airports | 15-30 minutes, more predictable queue times |
| Pre-Trip Inspection Time | Rushed atmosphere, pressure to move quickly | More accommodating for detailed vehicle walkaround |
The table makes it clear: the “convenience” of an on-airport location can easily be erased by a 90-minute line, only to be handed the keys to an ill-equipped AWD SUV instead of a true 4×4. The most critical factor for our purposes is the Pre-Trip Inspection Time. An on-airport agent with a long line behind you will be impatient as you check tire pressure and look for a lug nut key. An off-airport specialist expects this level of scrutiny. You must build this time into your plan. Assume a minimum of 30 minutes for your inspection, plus travel and wait times. For a peak-season airport pickup, a 2-hour buffer from landing to driving away is not unreasonable.
Rushing the pickup process is where critical mistakes are made. Build enough time into your schedule to be thorough and suspicious.
The High Point: How to Drive Over Rocks Without Smashing the Differential?
When navigating a rocky trail, the lowest point of your vehicle is the most vulnerable. On most solid-axle 4x4s, this is the differential housing—the pumpkin-shaped lump in the middle of the axle. Smashing this on a rock can crack the housing, drain your gear oil, and leave you immobile. The fundamental technique for rock crawling is to know where your “low point” is and guide your tires so the differential passes over the “high point” of the trail, not the obstacle.
This requires precision that’s nearly impossible to achieve from the driver’s seat alone. This is the job of a spotter. A spotter acts as the driver’s eyes, standing outside the vehicle to guide them through an obstacle. This isn’t a casual conversation; it’s a clear, concise system of communication. Relying on vague hand waves is dangerous. A standardized set of hand signals is required for safety and precision.
Before attempting any obstacle, the driver and spotter must agree on these signals. The spotter should always be visible to the driver in a mirror or through the windshield.
- Signal: Closed fist raised – Meaning: STOP immediately. The spotter sees imminent danger. This is a non-negotiable, full-stop command.
- Signal: One finger pointing left or right – Meaning: Turn the top of the steering wheel in that direction. The spotter dictates the front tire placement.
- Signal: Flat hand, palm down, moving toward the ground – Meaning: Move forward slowly. The spotter is guiding you inch by inch.
- Signal: Two hands making a spreading motion – Meaning: Your line is too narrow. You need to steer away from the obstacle to give the differential or tires more clearance.
- Signal: Thumbs up or a clear “go” motion – Meaning: You are clear of the obstacle and can proceed at normal crawl speed.
The goal is not to conquer the obstacle; it’s to navigate the obstacle without leaving any parts of your rental vehicle behind.
Jump Starter Packs: Why You Can’t Rely on Jumper Cables at Empty Trailheads?
Jumper cables are a relic of a more populated world. They operate on a single, flawed premise: that another running vehicle will be nearby when your battery dies. At a remote trailhead at dawn, this is a fantasy. A dead battery, whether from a light left on or an old battery failing in the cold, is a common and completely preventable trip-ender. The modern, self-reliant solution is a portable lithium-ion jump starter pack.
However, not all jump starters are created equal. A cheap, low-power unit designed for a 4-cylinder sedan will not have the power to turn over the large V6 or V8 engine in a 4×4, especially in cold weather which saps battery performance. Choosing the right tool requires looking at the specifications like a mechanic. For a typical off-road vehicle, you need a jump starter that delivers a minimum of 1000 peak amps. This is the initial burst of energy needed to crank a resistant engine.
Battery capacity, measured in milliamp-hours (mAh), determines how many jumps the unit can perform. A 15,000 mAh unit is a good baseline, providing enough power for multiple attempts or to help other stranded hikers. Crucially, these units are also multi-purpose survival tools. Their USB ports can recharge a GPS, satellite messenger, or phone, while the built-in LED flashlight provides emergency lighting. Safety features like reverse polarity protection are essential, as they prevent damage to the vehicle’s electronics if you mistakenly connect the clamps incorrectly in the dark. Given that cold weather can reduce a lithium battery’s output, it’s wise to buy a unit with 20-30% more capacity than the minimum and keep it in your sleeping bag on frigid nights to maintain its effectiveness.
This single piece of equipment is a cheap insurance policy against one of the most common backcountry vehicle problems.
Key takeaways
- Your credit card’s rental insurance is likely void on dirt roads due to “pavement clauses”; you must verify coverage in writing.
- You are responsible for auditing the spare tire system—confirm it’s a full-size spare with proper pressure and that all tools, including the locking lug nut key, are present and functional.
- Systematic documentation is your only defense. Take a detailed video of the vehicle’s condition, inside and out, before leaving the rental lot.
Booking Unusual Lodging: What Insurance Covers a Stay in a Converted Silo or Cave?
Your responsibility for the rental vehicle doesn’t end at the trailhead. It extends to the long, private driveway leading to your unique Airbnb. When you book accommodations like a converted silo, a remote cabin, or a cave dwelling, you are often agreeing to traverse unmaintained, private access roads. Damage that occurs here exists in an insurance grey area, a perfect storm of liability.
A case study illustrates the problem: a renter’s vehicle is damaged on a rough, private dirt road leading to their lodging. The host’s liability insurance typically only covers guest injury on their property, not damage to a guest’s rental car. Simultaneously, the rental car agreement and your credit card insurance likely exclude coverage on “private” or “unmaintained” roads. You are caught in the middle, with each party pointing fingers at the other.
The only defense in this scenario is proactive documentation and diligence. First, before you even book, communicate with the host. Ask for recent photos of the access road and specifically inquire if previous guests have had issues with standard vehicles. This creates a paper trail. Second, upon arrival at the lodging, you must conduct another inspection. Immediately photograph and, ideally, video-record the vehicle’s condition, paying special attention to the undercarriage, tires, and front bumper. This captures a new baseline, proving what damage may or may not have occurred on that final access road.
Your inspection process is a continuous loop. It begins the moment you see the vehicle at the rental lot and doesn’t end until you have a signed receipt in your hand confirming its safe return. Be thorough, be suspicious, and document everything. It’s the only way to ensure your adventure doesn’t end with a bill for someone else’s neglect.