Staying warm in a winter yurt has less to do with burning more wood and more to do with mastering heat and moisture physics.
- The biggest sources of cold are not drafts, but heat stratification (cold floors) and interior humidity.
- A slow-burning, all-night fire is an art form that relies on a coal bed and dense hardwood, not just a full firebox.
Recommendation: Focus on managing the air you can’t see—by circulating stratified heat and purging moist air—to achieve deep, lasting warmth.
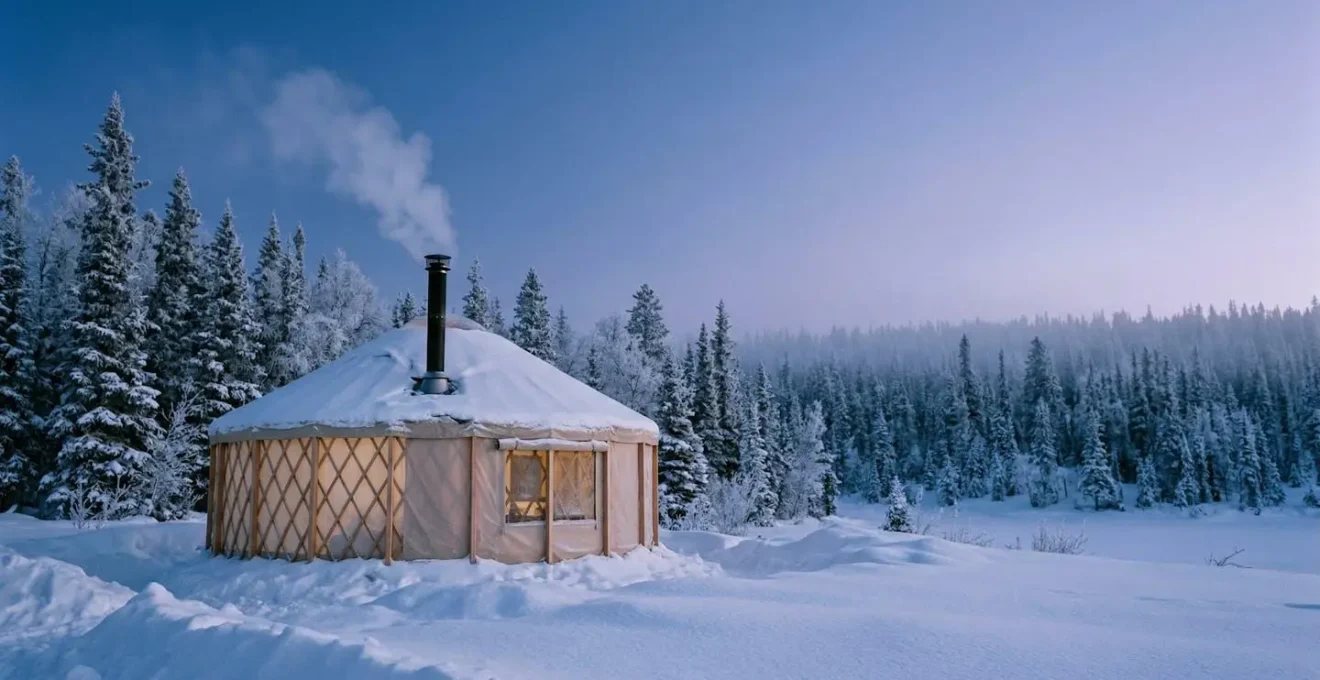
The thought of a winter getaway in a beautiful, snow-covered yurt is enchanting. You picture yourself with a hot drink, watching snowflakes drift down through the central skylight. But then, a creeping fear sets in: the fear of being cold. Not just a little chilly, but the deep, bone-aching cold that comes when the temperature plummets to -20°C and the only thing between you and the elements is a layer of fabric. The common advice seems obvious: build a big fire and wear lots of layers. But anyone who has tried this knows it often leads to a cycle of sweating near the stove while your feet remain frozen, only to wake up shivering at 3 a.m. when the fire dies.
This approach is flawed because it treats the yurt like a house, focusing only on generating heat. But a yurt is a unique thermal environment. The real secret to sustainable, comfortable warmth in a yurt isn’t about brute force; it’s about finessing a delicate balance of thermodynamics. What if the key wasn’t a bigger fire, but a smarter fire? What if opening a window for a few minutes could actually make you warmer in the long run? And what if the most important piece of insulation wasn’t in the walls, but on your feet?
This guide delves into the counter-intuitive science of yurt comfort in deep winter. We’ll move beyond the platitudes to explore the practical physics of heat management. We’ll start with mastering the heart of the yurt—the wood stove—and then explore how to manage the air, the structure, and finally, yourself, to ensure your snowy escape is cozy, not cold. Prepare to rethink everything you thought you knew about staying warm.
This article provides a comprehensive roadmap to winter yurt comfort. Explore the sections below to master each aspect of thermal management for a truly warm and memorable stay.
Summary: Your Guide to a Cozy Winter Yurt Experience
- The Art of the Bank: How to Keep a Wood Stove Burning All Night?
- Why You Need Slippers: Understanding Stratification of Heat in Yurts?
- Opening a Window in Winter: Why Fresh Air Makes the Yurt Warmer?
- Wool vs Canvas Insulation: Which Yurt Construction Holds Heat Best?
- Mid-Week vs Weekend: When to Book for a Solitary Winter Experience?
- Why Condensation Soaks Your Sleeping Bag Even in a Waterproof Tent?
- 150 vs 250 GSM: Which Wool Weight Fits Your Activity Level?
- Living in Canvas Bell Tents: How to Prevent Mold During Humid Seasons?
The Art of the Bank: How to Keep a Wood Stove Burning All Night?
The number one anxiety for any winter yurt guest is the 3 a.m. chill when the fire goes out. The solution isn’t just stuffing the stove with wood before bed; it’s a precise technique known as “banking” the fire. This method is designed for slow combustion, releasing steady heat over many hours rather than a short, intense blaze. The goal is to create a deep, hot bed of coals that will slowly ignite large, dense logs throughout the night. This process prioritizes energy density and controlled airflow above all else.
The key is using the right fuel. Hardwoods like oak, maple, or birch are far superior to softwoods like pine or spruce for an overnight burn. It’s a matter of physics; hardwoods average 21.3 million BTUs per cord, offering significantly more potential heat energy than the 15.4 million BTUs from softwoods. Densely packed hardwood logs burn slower and produce longer-lasting coals, which are the engine of your all-night fire. By carefully arranging these logs on a pre-built bed of coals and restricting the damper, you transition the stove from a fire to a smoldering heat generator that can last up to eight hours.
Action Plan: Achieving an 8-Hour Overnight Burn
- Start early: Begin building your coal bed 4-5 hours before bedtime to create a deep, glowing foundation.
- Rake coals forward: Consolidate all hot coals to the front of the firebox, avoiding spreading them across the entire base.
- Load large hardwood logs: Place logs of 4-6 inches in diameter in an East-West orientation, pressed tightly to the back of the firebox.
- Nest logs tightly: Arrange the logs with minimal air gaps between them to significantly slow the burn rate.
- Initiate ignition: Position the front-most log so it just touches the glowing coal bed to begin the slow combustion process.
Mastering this technique transforms the wood stove from a constant chore into a reliable, self-regulating heat source for your winter shelter.
Why You Need Slippers: Understanding Stratification of Heat in Yurts?
Even with a roaring fire, you may notice a bizarre phenomenon: your face is sweating while your feet feel like blocks of ice. This isn’t a failure of the stove; it’s a perfect demonstration of thermal stratification. Hot air is less dense than cold air, so it rises. In a tall, round structure like a yurt, this effect is amplified. The air near the ceiling can be tropically warm, while the air at floor level remains stubbornly frigid. The yurt floor, being in contact with the frozen ground or a cold platform, acts as a constant heat sink.
The temperature difference can be staggering. In some structures, research on thermal destratification shows that temperature differentials of 10°C (18°F) can occur over a single vertical meter. This means if it’s a pleasant 20°C (68°F) at chest level, it could be a mere 10°C (50°F) at your ankles. This is why packing a thick pair of wool slippers is non-negotiable. They are not a luxury; they are a critical piece of personal insulation that creates a thermal break between your feet and the coldest part of the yurt. Some yurts use small ceiling fans to push the hot air back down, but relying on your own gear is the most dependable strategy.
Understanding this layering of heat is the first step toward managing it. You can’t fight the physics, but you can work with them. Keep activities low to the ground to a minimum, and always protect your feet. This simple awareness shifts your perspective from “the yurt is cold” to “the bottom of the yurt is cold,” which is a problem you can easily solve.
Opening a Window in Winter: Why Fresh Air Makes the Yurt Warmer?
It sounds like madness: when it’s -20°C outside, the last thing you’d want to do is open a window. Yet, it’s one of the most effective ways to manage long-term warmth and comfort. The enemy you’re fighting here isn’t the cold air from outside, but the humid air trapped inside. Every breath you take, every pot of water you boil for tea, releases water vapor into the yurt. This moisture-laden air has a lower capacity to hold heat and makes the environment feel damp and chilly. More importantly, when this warm, wet air hits the cold yurt walls, it condenses, soaking your insulation and making it less effective.
The solution is a technique called “pulse ventilation” or a strategic air exchange. By opening a window and the door for just a couple of minutes, you create a cross-draft that flushes out the entire volume of stale, humid air and replaces it with cold, dry air from outside. While this causes a brief dip in temperature, the new dry air is much easier and faster for your wood stove to heat up. Furthermore, you’ve just expelled liters of destructive water vapor before it can condense on your walls or in your sleeping bag. The thermal mass of the floor and furniture will retain its heat during this short exchange, so the yurt recovers its ambient temperature surprisingly quickly.
Case Study: Condensation Management in Canvas Yurts
Winter yurt dwellers in cold climates consistently report that condensation is a primary concern. Without proper management through ventilation, moisture from cooking, breathing, and drying gear accumulates on walls and the crown ring. This leads to mold, mildew, and deteriorating insulation. Successful yurt owners have found that implementing daily air exchange protocols is critical for maintaining dry conditions, which extends both the comfort and the structural life of the yurt through multiple harsh winter seasons.
Performing this quick air exchange two to three times a day is a cornerstone of advanced winter yurt living. It keeps the interior dry, improves air quality, and paradoxically makes the space feel warmer and more comfortable.
Wool vs Canvas Insulation: Which Yurt Construction Holds Heat Best?
Not all yurts are created equal, especially when it comes to winter performance. The difference between a comfortable stay and a miserable one often lies in the yurt’s construction, specifically its insulation package. The outer canvas is for waterproofing, but the real thermal performance comes from the layers underneath. Insulation is measured in R-value, which indicates its resistance to heat flow. The higher the R-value, the better the insulation.
While traditional yurts might use thick felted wool, modern winter yurts employ sophisticated multi-layer systems. These can include reflective foil layers (to block radiant heat loss), fiberglass or foam insulation, and air gaps, which are themselves excellent insulators. The biggest mistake is focusing only on the walls and roof. As yurt flooring specialists emphasize, a poorly insulated floor is the number one cause of heat loss in yurts. Since you are in direct contact with the floor, its temperature has an outsized impact on your perceived comfort. A yurt with R-10 walls but an R-25 insulated structural panel (SIP) floor will feel much warmer than one with the values reversed.
The following table provides a clear comparison of how different insulation types contribute to the overall R-value of a yurt’s components. As you can see, a premium multi-layer system with a high R-value floor is essential for truly cold climates.
| Component | Basic Insulation (Reflective) | Standard Fiberglass | Premium Rigid Foam | Multi-Layer System |
|---|---|---|---|---|
| Wall R-Value | R-5 to R-7 | R-9.7 | R-10 to R-13 | R-15+ |
| Roof R-Value | R-5 to R-7 | R-9 to R-11 | R-13.7 | R-16 to R-20 |
| Floor R-Value | Not included | R-10 to R-13 | R-16 (4.5″ SIP) | R-25 to R-30 (6.5″ SIP) |
| Material Type | Reflective bubble foil | Fiberglass batting | Polyiso/Polystyrene | Air gaps + multiple layers |
| Moisture Resistance | Excellent (vapor barrier) | Poor (attracts rodents) | Good | Excellent |
When booking a winter yurt, don’t be afraid to ask the host for specific details about the insulation package, especially the R-value of the floor. It’s the single best indicator of how well the structure will hold its heat.
Mid-Week vs Weekend: When to Book for a Solitary Winter Experience?
Choosing when to book your winter yurt trip involves more than just aligning with your work schedule. For those seeking true solitude and a deeper connection with the serene winter landscape, a mid-week booking is almost always superior to a weekend. Resorts and rental sites are naturally less crowded from Monday to Thursday, offering an unparalleled sense of peace. You’re more likely to have the trails to yourself, hear nothing but the sound of the wind in the trees, and see an undisturbed blanket of snow.
But there’s a fascinating thermal advantage to mid-week stays as well. It’s a concept tied to thermal mass. A yurt that has been continuously occupied retains a significant amount of residual heat in its floor, furniture, and thick insulation layers. A yurt that has been sitting empty and cold since Sunday evening will be “cold-soaked” by the time Friday night guests arrive. It takes a tremendous amount of energy (and firewood) to heat not just the air, but the entire physical mass of the yurt back to a comfortable temperature.
The Thermal Mass Advantage of Continuous Occupancy
Yurt rental operators report a significant heating efficiency difference between continuously occupied units and those left empty. A yurt kept at 18-21°C develops thermal equilibrium, with its floor and furniture radiating heat back into the space. A mid-week guest arriving at a recently occupied yurt may use 30-40% less firewood in the first 12 hours compared to a weekend guest arriving at a cold-soaked rental. This thermal mass effect is most pronounced in yurts with insulated wooden floors.
By arriving on a Tuesday, for example, you often benefit from the warmth generated by the previous occupants. The yurt is already at a thermal equilibrium, making it far easier and more efficient to keep warm. You get both more solitude and a cozier stay.
Why Condensation Soaks Your Sleeping Bag Even in a Waterproof Tent?
You wake up in your high-tech, fully waterproof yurt or tent, yet the outside of your sleeping bag is damp, or worse, covered in a fine layer of frost. It’s a deeply unsettling feeling, but it’s not a sign that your shelter is leaking. The culprit is your own body. This is the most personal and direct consequence of the principles of humidity we’ve been discussing. The moisture isn’t coming from the outside in; it’s being generated from the inside out.
When warm interior air meets cold exterior surfaces, moisture accumulates on walls, windows, and around the crown ring. Without proper management, this leads to mold, mildew, and deteriorating insulation.
– EcoFlow Winter Living Research, Winter Yurt Living: Practical Tips for Comfort & Warmth
Every night, the average person exhales about a liter of water vapor while sleeping. In an enclosed space like a yurt, that moisture has to go somewhere. The air inside the yurt, warmed by your body and the stove, holds this vapor. When this warm, moist air touches any surface that is at or below the dew point—like the cold inner wall of the yurt or the shell of your sleeping bag—the water vapor condenses back into liquid. It’s the same reason a glass of ice water “sweats” on a summer day. So, even if your yurt is perfectly waterproof, it’s not vapor-proof. Indeed, studies on enclosed space humidity show that you and your activities can produce liters of water vapor that will soak insulation if not managed.
This is why the “pulse ventilation” technique is so critical even before bed, and why ensuring some minimal, controlled airflow overnight (if your stove and yurt design safely allow it) is a tactic used by seasoned winter campers. You must give that moisture a path to escape before it decides to condense on your precious down sleeping bag, rendering its insulation useless.
150 vs 250 GSM: Which Wool Weight Fits Your Activity Level?
Managing your personal comfort in a yurt is just as important as managing the yurt’s environment. The classic advice is to “dress in layers,” but the expert approach is to use different weights of layers for different activity levels. The key metric for wool base layers is GSM (grams per square meter). A 150 GSM layer is lightweight and highly breathable, while a 250 GSM layer is thicker, warmer, and less breathable. The mistake is thinking 250 GSM is always better because it’s warmer.
The secret is to match the wool weight to your energy output. When you’re active—chopping wood, shoveling snow, or even just tidying up—your body is a furnace. A 150 GSM merino wool layer is perfect for this. It will provide a touch of insulation but, more importantly, it will excel at wicking moisture away from your skin, keeping you dry. If you wear a heavy 250 GSM layer while active, you’ll quickly overheat and soak it with sweat. That damp layer will then cause rapid, dangerous chilling the moment you stop moving.
Conversely, when you are sedentary—reading a book, cooking, or sitting by the fire—your body produces very little heat. This is when you need the 250+ GSM wool or a high-loft fleece. These heavier layers are designed to trap your static body heat and provide a thick barrier against the cold. The advanced technique is to proactively manage this layering system: wear the 150 GSM for activity, and have your 250 GSM layer ready to pull on the second you transition to a resting state, even if you don’t feel cold yet.
Your Yurt Layering System for Temperature Management
- Active Periods: Wear a 150 GSM merino base layer to wick moisture effectively while you generate heat.
- Transition Protocol: Before sitting down after activity, immediately change out of any damp 150 GSM layer to prevent rapid cooling.
- Sedentary Periods: Switch to 250+ GSM wool layers or high-loft fleece for superior static warmth.
- Sleeping: Combine a 250 GSM base layer with a down sleeping bag or wool blankets rated for temperatures 10°C lower than expected.
- Drying Rack: Always keep a dry set of both 150 GSM and 250 GSM layers hanging near (but not too close to) the stove for quick changes.
This dynamic approach to layering ensures you are always dry and appropriately insulated for the specific thermal demands of the moment.
Key Takeaways
- True yurt warmth comes from managing physics—heat stratification and humidity—not just brute-force heating.
- An all-night fire is a science of slow combustion using a coal bed and dense hardwood, not a lottery.
- Your personal comfort depends on proactive moisture management, both in the air (ventilation) and on your body (activity-specific layering).
Living in Canvas Bell Tents: How to Prevent Mold During Humid Seasons?
While our focus has been on deep winter, the principles of moisture management we’ve discussed are universal to canvas shelters, including yurts and bell tents, year-round. The very properties that make canvas a brilliant shelter material can also be its downfall if not managed correctly. This is especially true when it comes to preventing mold and mildew during humid seasons, a lesson that holds surprising relevance for winter frost.
The cotton canvas of a traditional yurt has a remarkable quality: when it gets wet, the fibers swell, tightening the weave and making the structure waterproof. This is excellent for rain, but it also means the canvas can trap interior humidity. This is the root cause of mildew in the humid summer months, and as we’ve seen, the cause of frost build-up in the freezing winter months. The problem is the same—trapped moisture—only the manifestation is different.
Canvas Material Science and Moisture Management
Researchers of long-term canvas shelters have noted that the same principle used to prevent summer mold—daily airing out—is critical for managing winter frost. Without regular air exchange, moisture-laden interior air condenses on the inner canvas walls. At -20°C, this condensation instantly forms frost. When the sun hits the yurt or the stove is fired up, this frost melts, soaking gear and insulation. Successful users implement a daily ‘air purge’ protocol to expel humid air while the thermal mass of the yurt’s furnishings retains its core heat.
Therefore, learning to live in harmony with a canvas shelter means embracing the daily ritual of air exchange. It’s about seeing the yurt not as a sealed box, but as a breathing entity. The dry, radiant heat from a wood stove is your greatest ally in this endeavor.
The dry heat a wood stove gives off is perfect for wet winters, and can even help prolong the life of your yurt throughout many winters by keeping moisture out.
– Living Intent Yurt Team, Yurtlife & Winter Warmth: Wood stoves, Insulation, and more
By mastering ventilation, you’re not just ensuring your comfort for a single night; you’re actively participating in the long-term health and longevity of the beautiful structure around you.
Now that you understand the interconnected systems of a warm winter yurt, you are equipped to turn the fear of freezing into an experience of profound, sustainable comfort. Put these principles into practice on your next adventure.