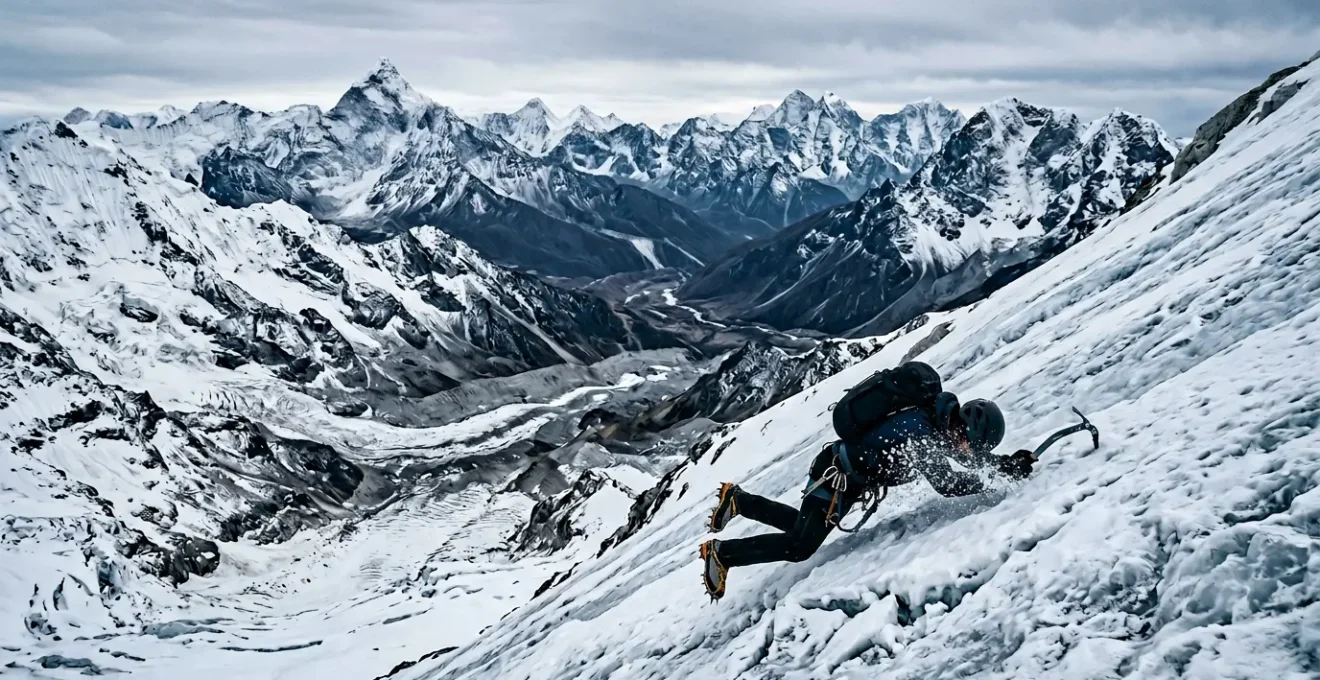
The scrape of crampons on blue ice, the sudden loss of purchase, the stomach-lurching acceleration—every alpinist understands the visceral fear of a fall on a steep slope. The standard response taught is immediate and violent: self-arrest. We practice ramming the pick of our ice axe into the snow, arching our bodies, and kicking our feet to stop the slide. But this is a fundamentally reactive posture. It’s a desperate, last-ditch effort when all other systems have already failed.
The conventional wisdom focuses on mastering this single, brutal skill. Yet, experienced alpinists know that a successful self-arrest is never guaranteed, especially on hard ice where an axe pick can fail to bite. The true art of managing risk in mixed terrain lies not in recovering from catastrophe, but in preventing it. It requires a shift in mindset from practicing one skill to performing a constant, rigorous Failure Point Analysis on every component of your alpine system. A fall that requires self-arrest is not an isolated event; it is the final outcome of a cascade of smaller, unmanaged failures.
This is not a guide about the mechanics of self-arrest. This is a guide to the systems that, when properly managed, make a self-arrest unnecessary. We will dissect the critical subsystems—from crevasse rescue and rope integrity to thermoregulation and logistics—that form the foundation of your safety. By learning to identify and mitigate the vulnerabilities within each, you develop the foresight that separates novices from seasoned mountaineers. You learn to stop the fall before it ever begins.
This guide will explore the essential systems and their common failure points, providing a comprehensive framework for proactive risk management in the mountains. By understanding these individual components, you build a more resilient and reliable overall safety strategy.
Summary: The Alpinist’s Guide to System Failure
- The Z-Pulley System: How to Haul a Partner Out of a Crevasse Solo?
- Dry Treatment: Does It Actually Stop Your Rope from Freezing Solid?
- Snow Blindness: Why Sunglasses Are Mandatory Even on Cloudy Days?
- The Belay Parka: When to Put It On to Stop Flash Cooling?
- Front-Pointing: How to Kick Steps Without Tiring Your Calves?
- The Mussy Hook Mistake: How to Thread the Anchor Without Dropping the Rope?
- Slider Failure: How to Fix a Separated Zipper in the Field?
- Planning Expedition Logistics: How to Secure Permits for Restricted Wilderness Areas?
The Z-Pulley System: How to Haul a Partner Out of a Crevasse Solo?
The crevasse rescue system is your lifeline when the integrity of the entire team is compromised by a fall into a hidden void. This is not a theoretical exercise; Swiss Alpine Club statistics report a startling 70 crevasse falls in 2022 alone, a significant increase that highlights the growing environmental hostility of receding glaciers. A solo rescue requires an impeccable understanding of mechanical advantage. The Z-pulley, or 3:1 system, is the standard, but its failure point is not the theory—it’s the execution under extreme stress.
The system is built by creating a friction hitch (like a Prusik or Kleimheist) on the rope leading to the fallen climber, which acts as a progress-capture device. A second friction hitch is attached further up the rope and clipped to a pulley or carabiner on the anchor. The rope is then run from the fallen climber, through the pulley on the anchor, down to another pulley on the second friction hitch, and finally back to the rescuer. This setup theoretically triples the force you can apply.
The critical failure points are numerous: friction hitches that slip on an icy rope, inefficient carabiners that add significant friction, or incorrect setup that results in a 1:1 or 2:1 system instead. The key to system integrity is practice in a controlled environment until the process is automatic. You must be able to build, inspect, and operate the Z-pulley blindfolded, with gloves on, feeling the cold bite of reality.
As this image demonstrates, every knot and connection is a potential point of failure. The success of the haul depends on the precise, methodical construction of this mechanical advantage system. An incorrectly tied Prusik or a poorly seated carabiner can render the entire system useless when your partner’s life is on the line. The focus must be on flawless, repeatable execution under pressure.
Dry Treatment: Does It Actually Stop Your Rope from Freezing Solid?
Your rope is arguably the most critical component of your safety system. Its failure mode in alpine conditions is not just a catastrophic break, but a functional failure due to water absorption. A wet rope becomes heavy, difficult to handle, and dangerously prone to freezing solid, rendering it useless with protection devices and impossible to knot. This is where dry treatment becomes a critical system feature, but its function is widely misunderstood.
Dry treatment is not waterproofing. As the technical team at Namah Ropes explains, its purpose is to manage moisture at a microscopic level:
Dry treatment does not make a rope waterproof. Instead, it controls how moisture interacts with the rope’s fibers.
– Namah Ropes Technical Team, Namah Ropes: Dry-Treated Climbing Ropes Guide
The treatment involves coating the core fibers, the sheath fibers, or both with a hydrophobic polymer. This prevents water molecules from penetrating the nylon strands. For a rope to earn the UIAA “Dry” certification, it must demonstrate less than 5% water absorption in a standardized test. A non-treated rope, by contrast, can absorb up to 50% of its weight in water.
The failure point occurs when climbers assume “dry” means “impervious.” Prolonged exposure to melting ice and snow will eventually overwhelm any treatment. The system fails when the rope becomes stiff and unmanageable, or worse, freezes during a sudden temperature drop at a hanging belay. Therefore, managing your rope system involves more than just buying the right product; it means actively keeping the rope out of standing water and minimizing its contact with wet snow whenever possible. The treatment is a powerful line of defense, not a license for negligence.
Snow Blindness: Why Sunglasses Are Mandatory Even on Cloudy Days?
The visual system is fundamental to every decision made in the mountains, yet it is acutely vulnerable to an invisible threat: ultraviolet (UV) radiation. The failure of this system, known as photokeratitis or snow blindness, is excruciatingly painful and completely debilitating. It occurs when the cornea is sunburned by intense UV light, and the alpine environment is a perfect storm for this type of injury.
Two factors contribute to this extreme environmental hostility. First, UV intensity increases with altitude; studies on photokeratitis show a 4% increase in UV intensity for every 300 meters of elevation gain. At 3,000 meters (approx. 10,000 feet), you are exposed to 40% more UV than at sea level. Second, snow is a highly effective mirror. Measurements of snow albedo demonstrate that fresh snow reflects up to 85% of UV radiation, meaning you are being irradiated from below as well as from above. For comparison, sand reflects about 15% and water only 5%.
The most common failure point is complacency on overcast days. Climbers mistakenly believe that clouds block all UV radiation. While they reduce visible light, clouds—especially thin, high-altitude clouds—can be surprisingly transparent to UV rays. Removing your sunglasses for even a short period to get a “better look” can be enough to cause damage. The onset of symptoms is delayed by several hours, meaning you won’t realize the harm until you are back in your tent, with eyes that feel like they are full of sand.
Protecting your vision is non-negotiable. Category 4 lenses, with side shields to block reflected light, are the minimum standard for glacier travel. They are not a comfort item; they are a critical piece of safety equipment. To lose your vision in the high mountains is to become a liability to yourself and your entire team, rendering you incapable of navigating, belaying, or self-rescuing.
The Belay Parka: When to Put It On to Stop Flash Cooling?
An alpinist’s body is a furnace, and the thermoregulation system is the complex process that maintains its core temperature. The primary failure mode in this system is not gradual freezing, but rapid “flash cooling” or afterdrop—a swift, dangerous drop in core temperature that occurs the moment you stop moving. This is most common at belay stances after a strenuous pitch of ice climbing or front-pointing up a steep snow couloir. Your body, drenched in sweat from the effort, is suddenly stationary and exposed to wind and cold.
The consequences are severe. As your core temperature drops, your decision-making becomes impaired, your motor skills degrade, and your will to survive diminishes. A review of mountaineering accidents published in *High Altitude Medicine & Biology* found that hypothermia was seen in 14% of victims, a stark reminder that cold is a direct killer. The key to maintaining system integrity is pre-emptive action. This is the role of the belay parka.
A belay parka is a heavily insulated, oversized jacket, typically with a synthetic fill that retains warmth when damp. It is designed to be thrown on over all your other layers, including your shell and helmet, the instant you stop. The failure point is hesitation. Many climbers wait until they start to feel cold before putting on their parka. By then, the battle is already being lost; your body is spending precious energy to re-warm itself instead of preserving its heat. The correct protocol is to put the parka on before you expect to get cold. The moment you clip into the belay anchor, the parka should come out of your pack.
This simple act of discipline traps the massive amount of heat your body generated during the climb, creating a microclimate that allows you to recover, manage the ropes, and belay your partner without sliding into the first stages of hypothermia. The belay parka is not a luxury; it is your primary defense against flash cooling.
Front-Pointing: How to Kick Steps Without Tiring Your Calves?
The locomotion system in alpine climbing relies on the efficient use of crampons. On steep, hard snow or ice, the primary technique is front-pointing: driving the front points of your crampons directly into the slope. While effective, this technique has a significant failure point: rapid calf muscle fatigue. When your calves burn out, your ability to kick securely diminishes, your speed plummets, and the risk of a slip or fall skyrockets. Managing this system is about technique, not just brute strength.
The most common error is maintaining a “high-heels” posture, with the heel raised significantly higher than the toes. This constantly engages the calf muscles (gastrocnemius and soleus) without any rest, leading to a quick buildup of lactic acid. To mitigate this, alpinists must employ several key techniques to preserve the integrity of their muscular system.
First, focus on actively dropping your heel with every step. Even a slight drop can provide a micro-rest for the calf muscle, releasing tension and allowing blood flow. Second, vary your technique. Alternate between pure front-pointing and using a hybrid “French technique” (flat-footing) where the angle allows. Even a few steps with your feet flat on the snow can provide significant recovery. Third, incorporate the “rest step.” This involves pausing for a brief moment on a fully-weighted, straight leg, allowing the non-weighted leg to relax completely before taking the next step. This transfers the load from your muscles to your skeleton. Finally, ensure your crampons are properly fitted. A loose crampon forces your calf to work harder to provide stability.
Mastering front-pointing is not about having the strongest calves; it’s about having the smartest technique. By consciously managing your energy output and building rest into your movement, you can sustain upward progress for hours without redlining your muscles, thereby reducing the likelihood of a fatigue-induced stumble that could lead to a serious fall.
The Mussy Hook Mistake: How to Thread the Anchor Without Dropping the Rope?
The descent system is one of the most dangerous phases of any climb. Rappelling introduces multiple opportunities for catastrophic failure, often due to simple mistakes made by a tired mind. Data from the American Alpine Club is sobering, revealing 15 reported rappel incidents in 2024 alone, underscoring the high stakes of this procedure. One of the most common and unforgivable errors is dropping the rope while threading it through the anchor.
The Mussy hook (or Clove Hitch on a carabiner) is a simple, elegant technique designed to eliminate this specific failure point. The standard, flawed procedure involves untying from the end of the rope, threading it through the anchor rings or chains, and then re-tying in. The moment you are untied, a simple slip of cold fingers means your rope—and your only way down—is gone. The Mussy hook technique provides a crucial redundancy.
The procedure is as follows: while still tied into the end of the rope and secured to the anchor with your personal anchor system (PAS), pull up a bight of rope. Tie a Clove Hitch with this bight onto a locking carabiner. Clip this carabiner to your belay loop. Now, take the end of the rope (which is still tied to your harness), thread it through the anchor rings, and tie it back to your belay loop with a Figure-Eight follow-through. Only when you have double-checked this new connection do you untie your original knot. The Clove-Hitched carabiner (the Mussy hook) ensures that you are always connected to the rope system. If you were to drop the end while threading it, the rope is still attached to your harness.
Your Anchor Threading Safety Checklist
- Secure Yourself: Confirm you are attached to the anchor with your personal anchor system and that it is fully redundant.
- Create Redundancy: Pull a bight of rope and secure it to your belay loop using a Clove Hitch on a locking carabiner (the Mussy hook).
- Thread the Anchor: Take the rope’s end, thread it through the rappel rings/chains, and bring it back to your harness.
- Re-secure the System: Tie the rope end back to your belay loop with a fully dressed and checked Figure-Eight follow-through.
- Remove Redundancy: ONLY after confirming the new knot is secure, untie your original knot from the start of the process.
This deliberate, methodical process introduces a layer of protection against a simple, devastating mistake. It is a prime example of Failure Point Analysis in action: identify a potential catastrophe (dropping the rope) and implement a simple, foolproof protocol to make it impossible.
Slider Failure: How to Fix a Separated Zipper in the Field?
Your apparel is your primary shelter system in the mountains. A failure in this system, such as a separated zipper on a jacket or tent, can have dire consequences, exposing you to wind, snow, and rapid heat loss. A common failure point is the zipper slider. Over time, the metal slider can deform and spread apart, losing its ability to properly mesh the zipper teeth. When this happens, the zipper separates behind the slider, leaving you with an open garment that won’t close.
Fixing this in the field is a crucial skill that requires one simple tool: a multi-tool with a pair of needle-nose pliers. The goal is to carefully crimp the slider back to its original shape. The failure point in the repair itself is applying too much force, which can break the slider completely, or not enough, which won’t solve the problem. The approach must be incremental and precise.
First, work the slider down to the very bottom of the zipper track. Examine the slider closely. You will see two channels, one for each side of the zipper teeth. The gap has likely widened on the back side of the slider (the side facing away from the pull tab). Using your pliers, apply gentle, even pressure to squeeze the back of the slider together. Squeeze the left and right sides of the channel, not the top and bottom. The key is to be gentle and incremental. Apply a small amount of pressure, then test the zipper. If it still separates, move the slider back to the bottom and apply slightly more pressure.
Repeat this process until the slider properly engages the teeth without separating. It is far better to make five small adjustments than one large one that breaks the cast metal. This simple repair can mean the difference between a secure, warm shelter and a life-threatening exposure to the elements. It exemplifies the alpinist mindset: carry the right tools and know the techniques to fix system failures as they occur.
Key Takeaways
- True risk management is proactive ‘Failure Point Analysis’, not reactive skill execution like self-arrest.
- Every piece of gear and every technique is a system with potential vulnerabilities that must be understood and mitigated.
- Environmental hostility (cold, UV, altitude) constantly pressures your systems; your strategy must anticipate this pressure, not just react to it.
Planning Expedition Logistics: How to Secure Permits for Restricted Wilderness Areas?
The most critical phase of risk management often occurs months before you ever set foot on snow. The logistical system—your planning, research, and preparation—is the foundation upon which the entire expedition rests. A failure here can end a trip before it starts or set you up for disaster. A key component of this system for many major peaks is securing permits for restricted wilderness areas, such as national parks or special-use lands.
Securing a permit is not mere bureaucracy; it is an integral part of the mountain’s risk management ecosystem. Permitting systems are often in place to limit environmental impact, manage human waste, and ensure climbers have a minimum level of experience. The process itself forces a team to formalize its plans, objectives, and emergency protocols. The failure point is underestimating the complexity and timeline of this process.
For popular objectives like Denali or peaks in the Garhwal Himalaya, permit applications may be due six months to a year in advance. They often require detailed climbing resumes for each team member, a thorough gear list, a medical questionnaire, and a concrete itinerary. Some jurisdictions use a lottery system, while others operate on a first-come, first-served basis, with application windows that open and close in a matter of minutes. The first step is to identify the managing authority—a national park service, a local alpine club, or a government ministry—and obtain the most current regulations. Do not rely on second-hand information from blogs or old guidebooks, as rules can change annually.
This pre-trip discipline is a direct reflection of your on-mountain discipline. A team that is sloppy with its permit application is likely to be sloppy with its rope management and hazard assessment. The planning phase is your first test. Successfully navigating the logistical challenges demonstrates the foresight, attention to detail, and respect for the process that are essential for success and survival in the high mountains.
Begin applying Failure Point Analysis to every aspect of your climbing, from gear checks at home to decisions on the face. This proactive mindset is the ultimate tool for managing risk on complex terrain.