Contrary to popular belief, preparing for a tough hike isn’t about logging endless cardio miles. It’s a targeted physiological project designed to build load-bearing strength to handle elevation, bulletproof your joints against injury, and manage your energy like a professional athlete. This blueprint is your guide to transforming your body from average fitness to trail-ready, ensuring you lead the pack instead of slowing it down.
You booked the trip. The flights are confirmed, the epic, multi-day trek through stunning mountains is no longer a daydream. But now, a cold dread sets in. You look at the elevation profile and the daily mileage, then you look at your current fitness level. The fear isn’t just about finishing; it’s about being “that person”—the one holding everyone up, breathing heavily on every incline, wincing with every step downhill. You’ve heard the standard advice: do some cardio, maybe a few squats, and wear your new boots around the house. This is the path to mediocrity and, worse, to injury.
Forget that. Your preparation for a serious trek is not casual exercise; it’s a mission. It’s a targeted, 12-week physiological project with a clear objective: to re-engineer your body for a specific, demanding task. This isn’t about general fitness. It’s about building load-bearing strength to carry your pack effortlessly, developing iron-clad durability in your hips, knees, and ankles to prevent trip-ending injuries, and mastering your metabolic engine to avoid the dreaded “bonk” halfway up a mountain. The key isn’t to just train harder, but to train smarter by focusing on the specific systems that hiking challenges most.
This guide will move you beyond the platitudes. We will deconstruct the demands of a strenuous hike and provide a progressive, disciplined framework to build a body that is not just fit, but resilient and powerful on the trail. Prepare to move with confidence.
This comprehensive blueprint breaks down your 3-month training journey into critical, actionable phases. Below is the roadmap we will follow to get you physically and mentally prepared for your adventure.
Summary: Your 3-Month Hiking Fitness Blueprint
- Legs or Lungs: What Should You Prioritize for Elevation Gain?
- The 50-Mile Rule: How to Break in Boots Without Destroying Your Feet?
- Rucking Progression: How Much Weight Should You Add Each Week?
- The Hips and Calves Routine: Preventing Injury Before You Even Leave Home
- Tapering Off: When to Stop Training Before Your Flight?
- Active Recovery: How to Flush Lactate When You Sleep in a Tent?
- Tape and Drain: How to Fix Feet Without Stopping the Trek?
- Completing a Thru-Hike: How to Manage “Hiker Hunger” Without Bonking?
Legs or Lungs: What Should You Prioritize for Elevation Gain?
The common wisdom is that hiking is all about cardio. If you can run a 5k, you can handle a mountain, right? This is a dangerous oversimplification. While cardiovascular fitness (your “lungs”) is important for delivering oxygen, it’s your muscular strength and endurance (your “legs”) that truly determine your performance and safety on a trek with significant elevation gain. Your lungs help you get up the hill, but it’s your strength that gets you up the hill with a 30-pound pack and, crucially, gets you down the other side without injury.
Think of it as the difference between an engine and a chassis. Your cardio is the engine, but your legs are the chassis, suspension, and brakes all in one. Going uphill is a concentric, power-based movement. But going downhill is an eccentric, braking movement that puts immense stress on your quads, knees, and ankles. According to a nine-year University of Innsbruck study, an astonishing 75% of all trail-related injuries happen on the descent, precisely when fatigued muscles fail to stabilize joints. This is a failure of strength, not cardio.
A military training case study perfectly illustrates this point. Soldiers with superior leg strength (capable of squatting and deadlifting heavy weight) experienced only 10-15% strain from a 45lb ruck. In contrast, endurance-focused runners with less raw strength experienced 40-50% strain from the same load. They were performing 4-5 times more work because their chassis wasn’t strong enough for the cargo. For a hiker, this means your priority must be building load-bearing strength through exercises like weighted step-ups, goblet squats, and lunges. This strength foundation makes your cardio more efficient and, most importantly, protects you when you’re most vulnerable.
Ultimately, a strong hiker with average cardio will outperform and outlast a marathon runner with weak legs on a technical, loaded trek every single time.
The 50-Mile Rule: How to Break in Boots Without Destroying Your Feet?
Your hiking boots are the single most important piece of gear you own. Treating their break-in period as an afterthought is the fastest way to a miserable trip filled with blisters and foot pain. The goal isn’t just to make them “comfortable”; it’s to mold the boot to your foot and, just as importantly, to “harden” your foot to the boot. This process creates a single, integrated system that moves as one, drastically reducing the friction that causes hot spots and blisters. The common advice to wear them around the house is useless; you need real-world stress and mileage.
This is where the “50-Mile Rule” comes in. While the exact number varies, experts generally agree that a minimum of 20 to 50 miles of walking on varied terrain is necessary to properly break in a pair of sturdy hiking boots. This mileage allows the leather or synthetic materials to soften and conform to the unique shape of your foot, while also revealing potential problem areas before you’re a day’s hike from civilization. A 2016 Journal of Foot and Ankle Research study found a direct link between the lack of a proper break-in period and the incidence of blisters on multi-day trips, confirming that this is a non-negotiable step in your preparation.
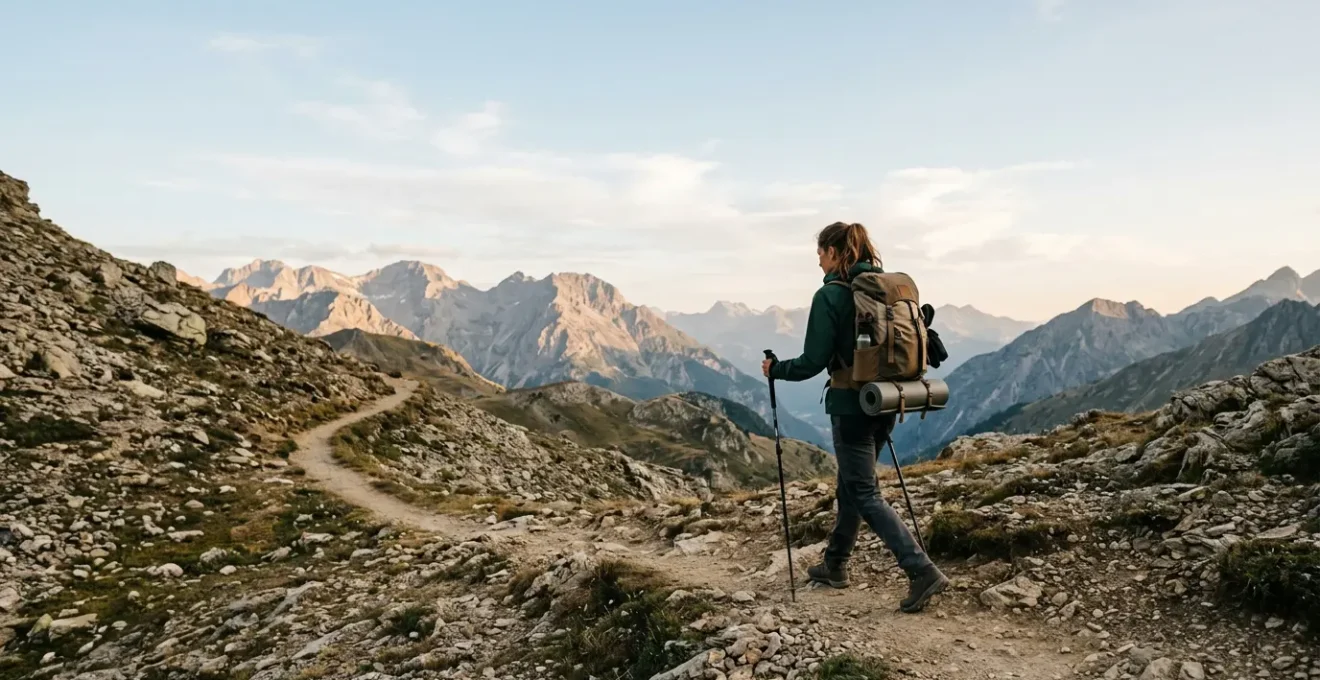
The break-in process is a system test. You must use the exact socks (including liners, if any) and insoles you plan to wear on the trek. Start with short walks on pavement, then progress to local trails with hills and uneven surfaces. Pay fanatical attention to any sensation of rubbing or warmth. This is the beginning of a hot spot. Stop immediately and address it. This process isn’t just about the boot; it’s about you learning the language of your feet.
As the image shows, testing your boots on real, textured ground is essential. Only by subjecting them to the same stresses they’ll face on the trail can you truly identify and resolve friction points. This meticulous process builds the foundation for pain-free miles.
Your Pre-Trek Foot System Audit Plan
- Friction Points Scan: After each test walk, remove your boots and socks. Methodically identify all areas of redness or tenderness on your foot—these are your critical friction points.
- Gear Inventory: Lay out your complete foot system: boots, all planned socks (liners and main), and insoles. Ensure they work together without creating new pressure spots or bunching.
- Terrain Test Consistency: Wear the full, finalized system on varied terrain including hills, flat ground, and rocky patches. Verify that performance is consistent and no new issues arise under different stresses.
- Hot Spot Mapping: Keep a log of where and when hot spots appear. Note the mileage and terrain. This “map” is your guide for preventative taping and adjustments on the trail.
- Adjustment & Hardening Plan: Based on your hot spot map, create a plan. This may involve pre-taping known areas, trying different lacing techniques, or simply logging more miles to build skin resilience.
Consider these 50 miles an investment. Every mile you walk at home is an investment in a pain-free mile on the trail. Do not cut corners here.
Rucking Progression: How Much Weight Should You Add Each Week?
Once your boots are broken in, the next phase of your physiological project begins: training your body to carry a load. This practice, known as “rucking,” is the most specific and effective way to build hiking-specific strength. It conditions your shoulders, back, core, and legs to work in unison under the exact stress they will face on the trail. However, the key to successful rucking is progressive overload. Simply throwing a heavy weight on your back and hoping for the best is a recipe for injury and burnout.
The golden rule for progression is to be patient and systematic. Training experts recommend increasing your pack weight by no more than 10% per week. For beginners, a more conservative approach of adding 5 lbs every 1-2 weeks is even safer. You should start with a weight that is challenging but manageable, typically 10-15% of your body weight. The goal of these early sessions is not to crush yourself, but to allow your musculoskeletal system—bones, tendons, and ligaments—to adapt to the new stress. This is about building a durable chassis, not just muscle.
As you get stronger, your progression can become more aggressive, but it should always be deliberate. Your training should simulate the demands of your trip. If your trek involves long, flat sections, focus on rucking for longer distances. If it’s full of steep climbs, find a hill or a stair machine and do weighted repeats. Your pack should contain the actual weight you plan to carry, using water bladders, sandbags, or your packed gear to hit your target weight for that week. This specificity is what separates professional preparation from amateur exercise.
The following table provides a clear progression model based on experience level. Find your starting point and adhere to the plan with discipline. This structured approach builds strength safely and effectively.
| Experience Level | Starting Weight | Weekly Increase | Target Weight Range | Training Frequency |
|---|---|---|---|---|
| Beginner | 10-15% body weight | 5 lbs every 1-2 weeks | 10-20 lbs | 2-3 sessions/week |
| Intermediate | 15-20% body weight | 5 lbs every week | 20-35 lbs | 3-4 sessions/week |
| Advanced | 20-25% body weight | 5-10 lbs every week | 35-60 lbs | 4-5 sessions/week |
| Military Standard | 25-30% body weight | Maintenance focus | 40-60 lbs | 4-6 sessions/week |
Remember, consistency is more important than intensity. Two disciplined rucks per week are far more valuable than one heroic, injury-risking effort once a month.
The Hips and Calves Routine: Preventing Injury Before You Even Leave Home
Most hikers who suffer from knee pain, IT band syndrome, or shin splints on the trail assume the problem is in their knees or lower legs. They are wrong. For the vast majority of overuse injuries in hiking, the root cause lies higher up the kinetic chain: in weak hips and tight calves. Your hips, specifically the gluteal muscles, are the engine of your lower body. They provide power for climbing and, more importantly, stability for your entire leg. When they are weak or fail to activate properly, other smaller muscles and joints are forced to compensate, leading to inflammation and pain.
The gluteus medius, a muscle on the side of your hip, is a prime culprit. Its job is to keep your pelvis level when you’re on one leg—which is half of every single step you take while hiking. When it’s weak, your hip drops, causing your knee to collapse inward. This repetitive, faulty movement pattern is the direct cause of the friction that leads to IT band syndrome and patellofemoral (runner’s knee) pain. As medical research confirms, this is a well-established biomechanical fact:
Weakness in the gluteus medius has been associated with lower-limb musculoskeletal pathology and gait disturbance, with dysfunction leading to issues such as IT band syndrome and patellofemoral pain syndrome.
– Physiopedia Medical Research, Gluteus Medius Function and Rehabilitation Study
Therefore, a core component of your training must be “bulletproofing” your hips and calves. This isn’t about heavy lifting; it’s about activation and endurance. Your routine should include exercises like clamshells, side-lying leg raises, and banded side steps to specifically target the gluteus medius. At the same time, you must maintain flexibility in your calves. Tight calves limit ankle dorsiflexion, which forces your body to find mobility elsewhere, often by over-pronating the foot or stressing the knee. Consistent calf stretching and foam rolling are non-negotiable. This two-pronged approach—strengthening the hips and lengthening the calves—is your best defense against the most common hiking injuries.
Do not wait for pain to tell you there’s a problem. Proactively building this muscular armor before you even leave home is the mark of a disciplined and intelligent hiker.
Tapering Off: When to Stop Training Before Your Flight?
After weeks of disciplined training, the instinct is to push hard right up until the day you leave, fearing any loss of fitness. This is a critical mistake. The final 7-10 days before your trip should be dedicated to a “taper,” a strategic reduction in training volume that allows your body to fully recover, repair, and adapt. Tapering is not “stopping” or “detraining”; it is the phase where you truly get stronger. It’s when your body absorbs all the hard work, replenishes glycogen stores, and repairs micro-tears in the muscle, a process known as supercompensation.
The science behind tapering is rooted in neuromuscular adaptation. Your strength gains are not just about muscle size, but about the efficiency of the connection between your brain and your muscles. Studies have repeatedly shown that these performance gains are remarkably durable. For example, evidence from multiple studies confirms that athletes can maintain their strength and power for several weeks after a significant reduction in training. A 2005 study in *Medicine and Science in Sports and Exercise* showed cyclists’ efficiency continued to increase for four weeks after finishing a strength program. This proves that a one-week taper will not make you weaker; it will make you arrive at the trailhead peaked, rested, and ready to perform.
Your taper should begin about one week before your departure. Reduce your training volume by 50-70%. If you were rucking for an hour, do it for 20-30 minutes with a lighter pack. If you were doing three sets of squats, do one. The intensity of your movements can remain high, but the duration and total workload must drop significantly. During this week, focus on sleep, hydration, and nutrition. You can incorporate light activity like walking or mobility work, but the goal is recovery, not further stress.
This period should be about mindful movement, as shown above. Focus on gentle stretching and mobility routines to keep your muscles limber without inducing fatigue. You are not building fitness anymore; you are harvesting it.
Arriving at the start of your trek tired and sore from last-minute cramming is an amateur move. Arrive rested, powerful, and hungry to perform. That is the professional approach.
Active Recovery: How to Flush Lactate When You Sleep in a Tent?
The day’s hike is done. You’ve pitched your tent, cooked your meal, and crawled into your sleeping bag. For most, this is the end of their effort until morning. For the disciplined hiker, this is when the most critical work begins: active recovery. What you do in that 30-minute window before you fall asleep and throughout the night determines how your body will feel and perform the next day. The goal is to shift your body from a catabolic (breaking down) state to an anabolic (building up) state as quickly as possible. This involves flushing metabolic waste like lactate, reducing inflammation, and signaling your nervous system that it’s time to repair.
The challenge is doing this in the cramped confines of a tent with minimal gear. Fortunately, some of the most effective techniques require nothing but your own body and a few common items. The moment you get into your tent, before you’re too stiff and cold, you should run through a dedicated recovery protocol. This isn’t about intense stretching, which can further damage tired muscles. It’s about gentle movement, promoting blood flow, and using gravity to your advantage. A simple routine can have a profound impact on reducing morning stiffness and soreness.
Your in-tent routine should become a non-negotiable daily ritual, as essential as filtering your water. These techniques are simple, fast, and incredibly effective for accelerating overnight muscle repair and reducing swelling:
- Legs-Up-The-Tent-Wall: The single best thing you can do for your tired legs. Lie on your back and prop your legs up against the wall of your tent for 5-10 minutes. This uses gravity to help drain lymphatic fluid and blood that has pooled in your feet and ankles, significantly reducing swelling.
- PNF Contract-Relax Stretching: To get a deeper, safer stretch in your hamstrings or glutes, pull your knee toward your chest until you feel a light stretch. Then, gently push your knee against your hands for 5 seconds (contract), then relax and use your hands to pull the knee deeper into the stretch for 20 seconds. This tricks your muscle’s stretch reflex, allowing for greater range of motion.
- Water Bottle Myofascial Release: Your hard Nalgene or similar water bottle is a perfect makeshift foam roller. While sitting, you can roll out your IT band, your calves, and the arch of your foot to release muscle adhesions and tension.
- Diaphragmatic Breathing: End your routine by lying on your back and focusing on deep “belly breaths.” This simple practice helps shift your nervous system from the “fight or flight” sympathetic state to the “rest and digest” parasympathetic state, which is essential for optimal overnight recovery.
The hiker who goes to sleep is recovering. The hiker who performs an active recovery protocol before sleeping is regenerating. Be the latter.
Tape and Drain: How to Fix Feet Without Stopping the Trek?
Even with the most meticulous preparation, problems can arise on the trail. A loose piece of grit in your boot or an unexpectedly humid day can create a hot spot that quickly blossoms into a trip-threatening blister. On a multi-day trek, stopping is not an option. You must be able to perform effective battlefield medicine on your own feet. Knowing how to properly tape hot spots and, when necessary, drain blisters is a critical survival skill that separates seasoned hikers from novices.
The first rule of foot care on the trail is hyper-vigilance. You must address discomfort the second you feel it. That faint warmth on your heel is a five-alarm fire. Stop immediately, take off your boot and sock, and assess the situation. If it’s just a red area (a hot spot), the solution is to eliminate friction. The best tool for this is a high-quality athletic tape like Leukotape. Applied smoothly over the area without any wrinkles, it creates a slick surface that allows the sock to glide over the skin instead of rubbing against it. This simple act can prevent 99% of blisters from ever forming.
But what if you’re too late and a blister has already formed? The decision to drain it depends on its condition. If the blister is small, firm, and not in a high-friction area, it’s best to leave it intact and protect it. The “donut hole” technique is perfect for this: cut a hole in a piece of moleskin or a blister pad that is slightly larger than the blister, and place it so the blister sits inside the hole. This fortress relieves direct pressure. However, if the blister is large, tense, and in a spot where it’s guaranteed to pop (like the back of your heel), it’s better to drain it in a controlled, sterile manner. Use a needle sterilized with an alcohol wipe or a flame, prick the base of the blister, gently drain the fluid, apply antibiotic ointment, and then cover it securely. The following protocol should be committed to memory:
- Prevention First: Your primary defense is wearing moisture-wicking socks (or a double-sock system) to minimize friction between your skin and the boot.
- Early Detection: Stay vigilant. The moment you feel any discomfort, stop and address it before a hot spot becomes a full-blown blister.
- The Donut Hole: For intact blisters, build a protective fortress around them with moleskin cut into a donut shape to relieve direct pressure.
- Drainage Decision: Only drain large, tense blisters in high-friction areas. Always use a sterilized needle, clean the area, apply antibiotic ointment, and cover it. Leave small, painless blisters intact.
- Masterful Taping: Use a durable, slick tape like Leukotape or a friction-reducing product like Body Glide over any hot spots. Apply it smoothly, without wrinkles, to create a frictionless surface.
Your feet are your vehicle. Knowing how to perform maintenance and emergency repairs is not just a good idea—it is your responsibility.
Key Takeaways
- Strength Over Cardio: Prioritize building load-bearing leg and core strength; it’s the foundation for both uphill power and downhill safety.
- Systematic Progression: Treat your training as a project. Break in boots with the “50-Mile Rule” and increase pack weight by no more than 10% per week.
- Injury-Proof from the Hips: The root of most hiking knee and leg pain is weak hips. A dedicated hip and calf routine is your best insurance policy against injury.
Completing a Thru-Hike: How to Manage “Hiker Hunger” Without Bonking?
On a multi-day, strenuous hike, your body becomes a furnace. Research shows that multi-day trekking can burn an astonishing 3,000-4,000 calories per day, and sometimes far more. The ravenous, all-consuming appetite that results is known as “hiker hunger.” Many see it as a badge of honor, but a professional sees it for what it is: a warning sign that you are in a massive calorie deficit and on the verge of “bonking”—a state of total energy depletion that can ruin your day and compromise your safety. Managing hiker hunger isn’t about eating a huge dinner; it’s about disciplined, proactive fueling throughout the entire day.
The key is to stay ahead of the deficit. You cannot simply rely on your body’s hunger signals, as they often arrive too late. By the time you feel famished, your performance is already declining. Instead, you must treat fueling like a scheduled task. This means front-loading your calories at breakfast, constantly grazing on calorie-dense snacks throughout the day, and finishing with a protein-focused meal at night to facilitate muscle repair. This strategy maintains stable blood sugar levels and ensures a constant supply of energy to your working muscles.
Your trail nutrition should be lightweight, calorie-dense, and easy to digest. Think nuts, seeds, dried fruit, cheese, and quality energy bars. It’s also critical to manage your hydration and electrolytes. Dehydration can be easily mistaken for hunger and severely impacts performance. Adding electrolyte powders or tablets to your water replaces the essential salts lost through sweat, preventing cramps and crashes. Your approach to nutrition on the trail should be as disciplined as your physical training.
A successful fueling strategy is built on discipline, not appetite. Your pack should be a mobile pantry, organized for easy access to the fuel you need, exactly when you need it. The following strategy will help you master your metabolic engine:
- Front-Loading Strategy: Eat your largest meal at breakfast. This provides the calories you’ll burn during the day, preventing a mid-day bonk and reserving dinner for recovery and repair.
- Timed Fueling Discipline: Set a timer on your watch to remind you to eat a small, calorie-dense snack (like a handful of nuts or some dried dates) every 60-90 minutes, regardless of whether you feel hungry.
- Bedtime Protein Protocol: Consume 20-30g of slow-digesting protein and some healthy fats (like a scoop of peanut butter) right before sleep to fuel overnight muscle repair and wake up feeling more satiated.
- Electrolyte Intelligence: During hot or strenuous days, consistently add electrolyte powders or tablets to your water to replenish sodium, potassium, and magnesium.
- Hydration Discipline: Begin hydrating the day before a big hike. On the trail, use a hydration bladder to sip water constantly, aiming for clear urine as an indicator of proper hydration.
By transforming your approach from reactive eating to proactive fueling, you turn nutrition into a competitive advantage, ensuring you finish every day strong and ready for the next.