The most effective way to manage knee pain while hiking is to treat your backpack as a medical device, systematically reducing its weight to de-load your joints.
- Shifting to an ultralight philosophy is a physiotherapy strategy, not just a gear hobby. It directly reduces the biomechanical forces that cause joint inflammation and damage.
- Every gram saved on your back multiplies into kilograms of reduced pressure on your knees with every step, especially on inclines and declines.
Recommendation: Begin by weighing every single item of your current gear. This initial audit is the first, non-negotiable step toward building a pain-free hiking system.
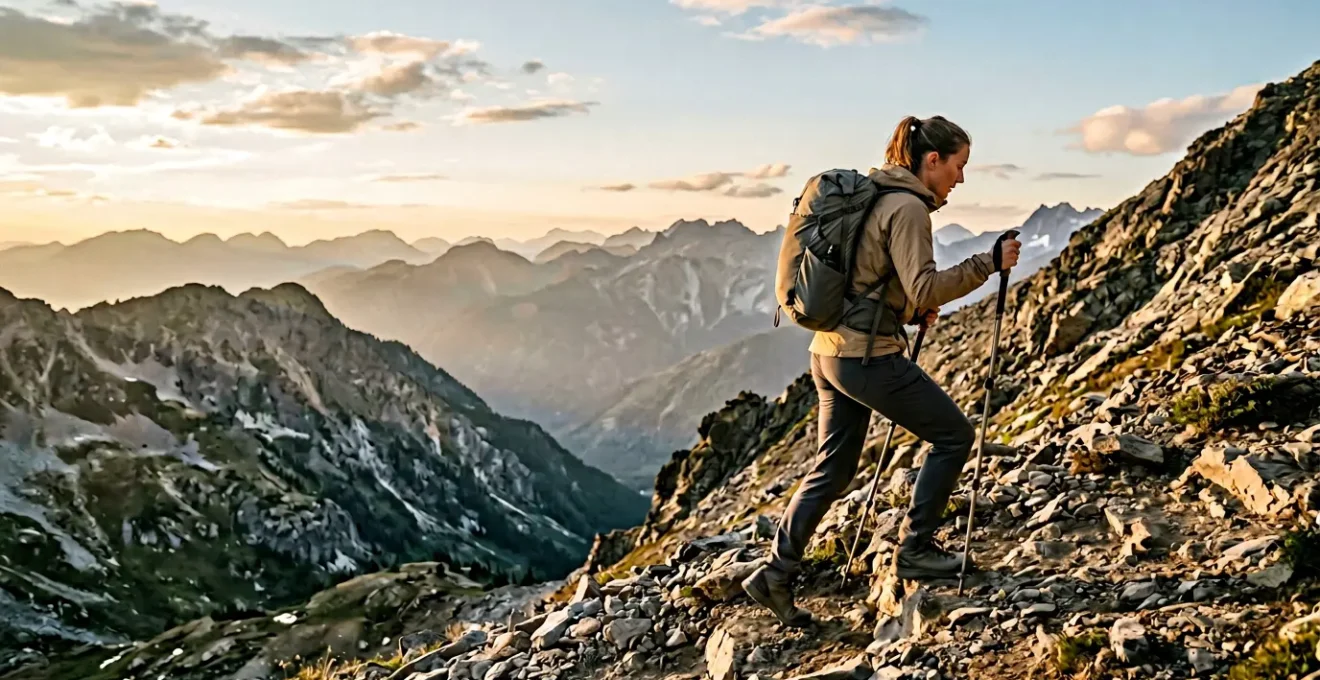
For hikers with joint issues or those advancing in age, a sharp knee pain can feel like a final verdict on their passion. The common advice—use trekking poles, take painkillers, or simply hike less—often feels like a compromise, not a solution. We’re told to manage the pain rather than eliminate its source. This approach overlooks the most significant variable in the entire equation: the crushing weight we choose to carry on our backs. Every kilogram in your pack is a direct multiplier of the force exerted on your patellofemoral joint, the epicenter of most hiker’s knee pain.
But what if we reframed the problem? What if, instead of just treating symptoms, we altered the physics of our activity? This is the core principle of ultralight backpacking, but viewed through a clinical lens. It’s not about chasing an arbitrary number on a spreadsheet or sacrificing safety for the sake of a few grams. It’s a deliberate, calculated physiotherapy strategy. By systematically cutting your “base weight”—the weight of your pack excluding consumables like food, water, and fuel—you are actively performing a therapeutic intervention. You are re-engineering your body’s mechanics on the trail to preserve your joints and extend your hiking longevity.
This guide will walk you through this process from a physiotherapist’s perspective. We will move beyond the simple mantra of “buy lighter gear” and delve into the biomechanics of load management. We’ll analyze the trade-offs between weight, function, and cost, establish safe conditioning protocols, and ultimately build a holistic system that allows you to continue exploring wild places, not in spite of your knees, but in harmony with them.
To navigate this comprehensive approach, this article breaks down the process into key strategic areas. The following summary outlines the journey from initial gear audit to advanced concepts in physical conditioning and recovery.
Summary: A Strategic Framework for Pain-Free Hiking
- The Scale Doesn’t Lie: How to Weigh Your Gear to Find Hidden Kilos?
- Drilling Holes: Is Extreme Weight Cutting Worth the Loss of Function?
- Poncho-Tarp: Can One Item Really Serve as Rain Gear and Shelter?
- Dyneema vs Silnylon: Is Saving 200g Worth an Extra $300?
- Packing Structure: How to Create a Virtual Frame with Your Sleeping Pad?
- Rucking Progression: How Much Weight Should You Add Each Week?
- Zero Days: When to Rest Your Feet to Prevent Stress Fractures?
- Planning Multi-Sport Wilderness Adventures: How to Transition from Biking to Kayaking Smoothly?
The Scale Doesn’t Lie: How to Weigh Your Gear to Find Hidden Kilos?
The first step in any therapeutic process is diagnosis, and in the context of pack weight, this means a ruthless gear audit. You cannot manage what you do not measure. The goal is to identify every gram, creating a detailed baseline from which all future decisions will be made. For many, this is a shocking revelation, uncovering “hidden” kilograms in items long considered essential. A simple kitchen scale is your most important tool at this stage. Weigh everything individually—from your tent stakes to your headlamp to the stuff sack it lives in—and record it in a spreadsheet. This is not about shame; it’s about data.
The established threshold for an ultralight base weight is under 4.5 kg (10 lb) according to ultralight backpacking standards. For a hiker with knee pain, this number isn’t a badge of honor, but a clinical target for significant joint de-loading. Getting below this weight fundamentally changes the forces acting on your body. It’s the difference between your knees absorbing the impact of a heavy, lumbering gait versus a light, natural stride. This process is a journey of incremental gains, not a single, expensive shopping spree. It’s about questioning every item: “Is its function worth its weight?”
Case Study: The Jardine Method of Systematic Reduction
Ray Jardine, a pioneer of the ultralight movement, provides a powerful example of this iterative process. On his first Pacific Crest Trail thru-hike, his base weight was a respectable 5.7 kg. By his third, through meticulous gear auditing, DIY modifications, and strategic replacement, he had reduced it to below 4.5 kg. This wasn’t achieved overnight but through a systematic, multi-year campaign of weighing, analyzing, and optimizing. His journey proves that achieving a therapeutic base weight is a result of a persistent, analytical process, not a quick fix.
This data-driven approach transforms the abstract concept of “a heavy pack” into a concrete list of opportunities for improvement, forming the basis of your pain-management strategy.
Drilling Holes: Is Extreme Weight Cutting Worth the Loss of Function?
Once you have your data, the temptation is to cut weight at all costs. This is where the infamous image of drilling holes in a toothbrush handle comes from. While extreme measures can shave grams, for a hiker focused on safety and joint health, they can cross a dangerous line. The critical concept here is the “functional threshold”—the point at which reducing weight compromises the reliability, safety, or essential function of a piece of gear. A spork handle cut too short may save 5 grams, but if it becomes unusable, you’ve gained nothing. A frameless pack might be lighter, but if it transfers the remaining load improperly to your spine and hips, it can create new biomechanical problems.
This balance between weight and function is the central dilemma in gear design. As the experts at SlingFin succinctly put it when discussing the trade-offs in tent fabrics:
Do you want it to be light, strong, or inexpensive? You can pick two, but you sure as hell can’t have all three.
– SlingFin Tent Design Team, Tent Fabric 101: Nylon vs Polyester vs Dyneema/Cuben
This principle extends to all gear. Choosing ultralight materials often means accepting a trade-off in durability or cost. From a physiotherapist’s view, the question is: “Does this reduction in weight provide a greater biomechanical benefit than the loss in function or safety it creates?”
The delicate weave of advanced fabrics, as seen above, is a testament to this compromise. The material is incredibly light but may be more susceptible to abrasion or puncture. For an older hiker or someone prone to injury, a catastrophic gear failure far from a trailhead is a much greater risk than carrying a few extra hundred grams. The goal is not weight reduction for its own sake, but optimized function-to-weight ratio that enhances, rather than endangers, your time on the trail.
Therefore, every decision to modify or replace gear must be weighed against its potential impact on your safety and overall system integrity.
Poncho-Tarp: Can One Item Really Serve as Rain Gear and Shelter?
One of the most effective strategies for cutting significant weight without compromising core function is to embrace multi-use items. This isn’t about risky modifications but about smart system design. Why carry a separate rain jacket, pack cover, and shelter when a single, well-designed item like a poncho-tarp can fulfill all three roles? Every item that serves double or triple duty eliminates the weight and bulk of one or two other items entirely. This is where the most dramatic and intelligent weight savings are found.
This philosophy of gear consolidation is a cornerstone of effective joint de-loading. A hiking pole is not just for stability; it’s also a tent pole for your tarp shelter. Your sleeping pad isn’t just for comfort; it can form the virtual frame of a frameless backpack, transferring load to your hips. Your cooking pot is your mug and your bowl. This mindset shift—from a collection of individual items to an integrated, synergistic system—is what separates novice packers from expert ultralight hikers. For the hiker with knee pain, this means you can achieve a therapeutic base weight without necessarily spending a fortune on the latest space-age materials.
The key is to think creatively and critically about your needs. Do you really need a separate camp pillow, or can you use a stuff sack filled with your down jacket? By identifying and eliminating redundancies, you strip your pack down to the functional essentials. This not only lightens the load but also simplifies your entire wilderness experience, allowing for more focus on your surroundings and less on managing a cumbersome kit.
Your Gear Consolidation Audit: A 5-Point Checklist
- Multi-Use Potential: List all single-function items (e.g., rain jacket, pack cover) and brainstorm potential multi-use replacements (e.g., poncho-tarp).
- Redundancy Check: Inventory your packed clothing and tools. Identify and eliminate duplicates (e.g., carrying both a multi-tool and a separate knife).
- Condition-Specific Planning: Confront your gear list with the specific weather and terrain forecast for your next trip. Remove anything that is a “just-in-case” for conditions you won’t actually face.
- Pre-Trip Shakedown: Before every hike, lay out all your gear. Pick up each item and ask: “Did I use this on my last trip? Can another item perform its function?”
- Field Testing: Test any new multi-use solution on a short, low-risk day hike before committing to it on a longer expedition to validate its performance and your ability to use it effectively.
This strategic approach to gear selection is fundamental to achieving a lighter pack and, by extension, healthier knees.
Dyneema vs Silnylon: Is Saving 200g Worth an Extra $300?
Nowhere are the trade-offs of ultralight gear more apparent than in the choice of shelter fabrics. The decision between Dyneema Composite Fabric (DCF) and traditional Silnylon or Silpoly is a classic case study in weight, performance, and cost. DCF is the darling of the ultralight world for good reason: it’s astonishingly light and completely waterproof, meaning it doesn’t absorb water and sag when wet. However, it comes at a premium price and has lower abrasion and puncture resistance than its heavier counterparts. This is where the physiotherapy perspective is essential: is the weight saving significant enough to justify the cost and potential durability issues?
The numbers can be compelling. For example, real-world testing of the Durston X-Mid 2 shows a 31% weight reduction (a saving of 244g / 8.6 oz) when moving from the Silpoly version to the DCF version. For someone with compromised knees, saving a quarter of a kilogram on a single item is a massive biomechanical win. This reduction in systemic load, carried over thousands of steps, translates directly into less cumulative stress on your joints. However, this saving can cost an additional $300 or more. The decision is deeply personal and depends on your budget and hiking style.
The following table breaks down the key properties to help you make an informed decision based on your priorities—be they financial, performance-driven, or a balance of both.
| Property | Dyneema (DCF) | Silnylon |
|---|---|---|
| Weight | Ultralight (0.5-0.8 oz/sq yd) | Lightweight but heavier |
| Water Absorption | Zero absorption, dries in 5-10 min | 2-3% weight gain when wet, dries in 30-60 min |
| Stretch/Sag When Wet | No stretch, maintains pitch | Significant sag, requires re-tensioning |
| Durability | Prone to micro-perforations, delamination risk | More puncture resistant, longer service life |
| Cost | Premium (approx. 3x price) | Budget-friendly |
| Repairability | Easy field repair with tape (permanent fix) | More difficult to patch effectively |
For some, the significant joint relief offered by DCF is a worthwhile medical expense; for others, the robust and budget-friendly nature of silnylon is the more prudent choice.
Packing Structure: How to Create a Virtual Frame with Your Sleeping Pad?
Reducing your base weight is only half the battle. How you *carry* that weight is just as critical for protecting your knees. An improperly packed bag, even a light one, can shift your center of gravity, forcing your core and leg muscles to work overtime to stabilize your body. This leads to inefficient movement and increased strain on your entire kinetic chain, from your ankles to your spine. The goal of a physiotherapist-approved packing strategy is to create a dense, stable, and balanced load that integrates seamlessly with your body, promoting optimal biomechanical efficiency.
This is especially true when using a frameless backpack to save weight. The “frame” is not absent; you create a virtual one using your gear. A folded foam sleeping pad (like a Z-Lite) placed against your back inside the pack creates a semi-rigid structure. It provides a cushion, prevents lumpy items from digging into your back, and most importantly, helps transfer the pack’s load to your hips via the hip belt. This is the single most important technique for making a frameless pack comfortable and biomechanically sound. Without this structure, the weight sags and pulls back on your shoulders, ruining your posture and stressing your joints.
The general principle is to pack your densest, heaviest items (like your food bag) close to your spine and in the middle of your back. Lighter, bulkier items like your sleeping bag or clothes form the bottom and top layers. This concentration of mass close to your natural center of gravity minimizes leverage and makes the pack feel like an extension of your body, not a pendulum swinging behind you. This attention to packing is vital, especially since research on ultralight backpacking demonstrates that roughly 70% of your base weight is in the “Big Three” (pack, shelter, sleep system). Mastering how these core items are structured is paramount.
A well-packed light load is far superior to a poorly packed even lighter load. It’s the application of physics to protect your anatomy.
Rucking Progression: How Much Weight Should You Add Each Week?
Once you’ve optimized your pack, you must condition your body to carry it. Simply heading out on a ten-mile hike with a new, albeit lighter, pack is a recipe for injury. Your musculoskeletal system needs time to adapt. This is where the principles of physical therapy—specifically progressive overload—come into play. Rucking, or walking with a weighted pack, is the perfect training modality. However, it must be done with a structured, patient approach to build resilience, not cause damage.
A common mistake is adding too much weight too quickly. While some military-tested rucking protocols recommend adding up to 5 lbs per week, this is aggressive for someone unconditioned or managing existing joint issues. A more conservative, physio-approved approach is to prioritize time and consistency over load. Start with a weight that feels manageable (e.g., 15-20 pounds) for a duration you can complete with good form, perhaps 45-60 minutes. Focus on increasing the duration of your rucks each week before you even consider adding more weight. Once you can comfortably ruck for 2-3 hours, then you can begin to add small increments of weight (2.5-5 lbs) every few weeks, always monitoring how your knees and back respond.
Proper form is non-negotiable. It protects your joints and ensures you’re strengthening the right muscles: your glutes, hamstrings, and core. Keep your shoulders back, chest up, and core engaged. Take shorter, quicker steps to reduce the heavy heel-strike and braking forces that send shockwaves up to your knees.
This process of progressive adaptation builds tissue resilience and neuromuscular control. You are teaching your body how to carry a load efficiently and safely. Rushing this process by adding too much weight or using poor form will only reinforce dysfunctional movement patterns and lead directly to the pain you’re trying to avoid.
Listen to your body, prioritize perfect form, and respect the principle of gradual adaptation.
Zero Days: When to Rest Your Feet to Prevent Stress Fractures?
The final, and often most ignored, component of a joint-preservation strategy is rest. In the pursuit of mileage and objectives, hikers frequently neglect the body’s need to repair and recover. This is a critical error. Hiking, especially in mountainous terrain, is a series of repetitive impacts. Every step sends force through your bones, muscles, and connective tissues. Without adequate rest, this micro-trauma accumulates, leading to overuse injuries like plantar fasciitis, tendonitis, and, most seriously, stress fractures. A “zero day”—a full day of rest with no hiking—is not a luxury; it’s a scheduled, essential part of a multi-day hike’s itinerary.
The need for rest is magnified by the immense forces involved. According to research highlighted by Harvard Medical School, walking at an incline puts two to three times your body weight of pressure on your knees, with declines generating even more. Even with an ultralight pack, these forces are significant. A zero day allows inflammation to subside and micro-tears in muscle fibers to heal, making the entire system stronger and more resilient for the days to come. Ignoring the early warning signs of fatigue and pushing through pain is a direct path to a trip-ending injury.
So, when should you take a zero day? It’s better to plan them proactively (e.g., every 5-7 days on a long trek) rather than waiting for your body to force one upon you. However, you must also learn to listen to the signs. Persistent soreness that doesn’t resolve overnight, new or sharp pains, or a deep sense of fatigue are clear signals that your body’s rate of breakdown is exceeding its rate of repair. For a hiker with a history of knee problems, being attuned to these signals is paramount. Resting for a day in a beautiful location is infinitely better than being forced to hobble off the trail for a month of recovery.
Honoring your body’s need for recovery is the ultimate expression of a sustainable, long-term hiking practice.
Key Takeaways
- Your primary goal is “joint de-loading”: every gear choice should be evaluated on its ability to reduce the biomechanical forces on your knees.
- Adopt a multi-use gear philosophy to make the most significant weight reductions without simply buying expensive equipment.
- Condition your body for the load. Use a structured, progressive rucking program that prioritizes good form and gradual adaptation over adding weight too quickly.
Planning Multi-Sport Wilderness Adventures: How to Transition from Biking to Kayaking Smoothly?
The principles of ultralight systems thinking and biomechanical efficiency extend far beyond traditional backpacking. They become the foundational logic for complex, multi-sport adventures where you might transition from mountain biking to packrafting in a single day. In these scenarios, your gear isn’t just carried; it must be adaptable, compact, and lightweight enough to not hinder performance in wildly different activities. This is the ultimate test of the physiotherapy-focused ultralight approach: creating a system that enables athletic performance across disciplines while continuing to protect your joints.
Imagine a bikerafting trip. The gear you carry while cycling must be compact and balanced enough to not affect your handling on singletrack. When you reach the river, your bike must be broken down and securely attached to your packraft, and your entire kit must fit within the boat without compromising stability or paddling ergonomics. Every piece of redundant gear, every ounce of unnecessary weight, is magnified. A heavy, bulky pack that is manageable for hiking becomes a dangerous liability on a bike and a capsizing risk on a boat. The ultralight mindset is no longer a preference; it is an enabling necessity.
This is where all the previous concepts converge. The ruthless gear audit (H2-1) ensures you’re starting with the leanest possible kit. The philosophy of functional trade-offs (H2-2) guides choices like an inflatable helmet over a hardshell. Multi-use items (H2-3) are paramount: your paddling PFD might have pockets that replace a cycling vest. An understanding of material science (H2-4) informs choices for gear that needs to be both light and durable. And the principles of load carrying (H2-5) and physical conditioning (H2-6) ensure your body can handle the unique demands of each sport without breaking down. It’s a holistic, integrated system designed for athletic longevity.
By applying this systematic, health-first approach to gear and conditioning, you transform your pack from a simple container into a sophisticated tool that unlocks new adventures and ensures you can pursue them with a strong, pain-free body for decades to come.